Scooter Wont Kickstart: Troubleshooting Tips to Get You Moving

If your scooter won’t kickstart, it could be due to several reasons such as a faulty ignition switch or spark plug, fuel problems, or a dead battery. Troubleshooting these potential issues can help you identify and resolve the problem.
Having a scooter that won’t kickstart can be frustrating. It can leave you stranded and unable to reach your destination. However, understanding the possible reasons behind this issue can help you troubleshoot and resolve the problem. We will explore some common factors that may prevent your scooter from starting and provide you with practical solutions to get your scooter up and running again.
By following these troubleshooting steps, you’ll be able to diagnose and fix the problem, ensuring that you can enjoy your scooter’s reliable performance once more. So, let’s dive in and uncover the reasons behind your scooter’s kickstarting troubles.
Identifying Common Kickstarting Problems
Kickstarting problems with your scooter? Identify common issues preventing it from starting with our helpful guide. Troubleshoot and fix the issue yourself.
If you’re facing an issue with kickstarting your scooter, it can be frustrating, especially if you rely on it for daily transportation. However, understanding the common problems that can cause this issue can help you diagnose and fix it quickly.
In this section, we will explore three key areas to inspect when your scooter won’t kickstart: the spark plug, the fuel supply, and the battery.
Inspecting The Spark Plug:
- Check the spark plug for signs of wear or damage, as a faulty spark plug can prevent your scooter from kickstarting.
- Make sure the spark plug is clean and free from debris, as dirt or corrosion can hinder the spark plug’s efficiency.
- Ensure that the spark plug is properly connected and tightened to eliminate any loose connections that can affect the ignition process.
Checking The Fuel Supply:
- Confirm that there is an adequate amount of fuel in the scooter’s gas tank. Running out of fuel is a common cause of kickstarting issues.
- Examine the fuel lines for any leaks or clogs that could restrict the flow of fuel to the engine.
- If your scooter has been sitting idle for an extended period, consider draining and replacing the old fuel. Stale fuel can impact the kickstarting process.
Examining The Battery:
- Inspect the battery terminals for any signs of corrosion or loose connections. Corroded terminals can disrupt the flow of electrical current.
- Test the battery voltage using a multimeter to ensure it has enough power to start the scooter. A low battery charge can prevent kickstarting.
- If your scooter has a kickstart feature alongside an electric starter, try kickstarting to bypass any potential issues with the battery or starter motor.
Remember, while these are common kickstarting problems, there could be underlying issues that require professional assistance. If you’ve inspected these areas and are still experiencing difficulties, it may be best to consult a mechanic or scooter specialist to diagnose and resolve the problem.
Troubleshooting The Spark Plug
Having trouble kickstarting your scooter? One possible culprit could be a malfunctioning spark plug. Learn how to troubleshoot and fix this common issue to get your scooter up and running again.
When your scooter won’t kickstart, one of the common culprits could be a faulty spark plug. A spark plug is responsible for igniting the fuel mixture in the engine, which ultimately powers your scooter. If the spark plug isn’t functioning properly, it can prevent your scooter from starting.
In this section, we will explore two troubleshooting methods for the spark plug: cleaning and replacing.
Cleaning The Spark Plug
Cleaning the spark plug can often solve minor issues and improve its performance. Follow these steps to clean your spark plug:
- Remove the spark plug: Locate the spark plug on your scooter’s engine and carefully remove it using a spark plug socket wrench.
- Inspect for dirt or debris: Examine the spark plug for any signs of dirt, carbon buildup, or debris. If you notice any, cleaning may be necessary.
- Clean the spark plug: Use a wire brush or a spark plug cleaner to gently scrub the electrode and the insulator tip. Ensure that you remove all visible dirt or carbon deposits.
- Check the spark plug gap: Using a spark plug gap tool, measure the gap between the electrode and the insulator. Adjust it as per the manufacturer’s specifications, if required.
- Reinstall the spark plug: Once cleaned, carefully insert the spark plug back into its socket and tighten it with a spark plug socket wrench.
Cleaning the spark plug is a simple and cost-effective troubleshooting method that can potentially resolve issues such as fouling, misfires, or poor combustion.
Replacing The Spark Plug
If cleaning the spark plug doesn’t resolve the issue, it may be necessary to replace it. Follow these steps to replace your spark plug:
- Identify the correct spark plug: Consult your scooter’s manual or contact the manufacturer to determine the correct spark plug model for your scooter. It’s crucial to use the recommended spark plug to ensure optimal performance.
- Remove the old spark plug: Using a spark plug socket wrench, carefully unscrew and remove the old spark plug from its socket. Take note of its position and the way it is threaded into the engine.
- Prepare the new spark plug: Before installing the new spark plug, check its gap to ensure it matches the manufacturer’s specifications. Adjust the gap, if necessary.
- Install the new spark plug: Carefully insert the new spark plug into the socket and hand-tighten it. Then, use a spark plug socket wrench to securely tighten the spark plug without over-tightening.
- Double-check and test: Ensure that the spark plug is properly seated and tightened. Once satisfied, attempt to kickstart your scooter to see if the new spark plug resolves the issue.
Replacing a spark plug is relatively straightforward and can help address more significant issues that cleaning alone may not solve. Regularly inspecting and replacing spark plugs as needed can contribute to your scooter’s smooth operation and reliable starting performance.
Remember, troubleshooting the spark plug is just one step in diagnosing the source of your scooter’s kickstarting problem. If the issue persists, further examination of other components, such as the fuel system or ignition system, may be necessary.
Diagnosing Fuel Supply Issues
Having trouble kickstarting your scooter? It could be due to fuel supply issues. Diagnose the problem to get your scooter back on the road.
Is your scooter refusing to start? Don’t fret! There are several potential fuel supply issues that could be the culprit behind your kickstarting woes. By conducting a thorough inspection and checking key components, you’ll be one step closer to resolving the problem.
In this section, we’ll delve into three important areas to focus on when diagnosing fuel supply issues: inspecting the fuel line, checking the fuel filter, and cleaning the carburetor.
Inspecting The Fuel Line:
When it comes to fuel supply issues, a clogged or damaged fuel line could be to blame. To determine if the fuel line is causing the problem, follow these steps:
- Start by visually inspecting the fuel line for any visible damage, such as cracks or leaks.
- Ensure that the fuel line is properly connected to both the fuel tank and the carburetor.
- Gently squeeze the fuel line to check for any blockages.
- If you suspect a blockage, carefully detach the fuel line and blow compressed air through it to clear any debris or obstructions.
By thoroughly inspecting the fuel line, you’ll be able to identify any issues that could be hindering the fuel supply to your scooter’s engine.
Checking The Fuel Filter:
Another potential culprit behind a scooter’s kickstarting troubles is a clogged fuel filter. Follow these simple steps to check the condition of your fuel filter:
- Locate the fuel filter, which is typically positioned between the fuel tank and the carburetor.
- Remove the fuel filter and visually inspect it for any signs of dirt, debris, or clogging.
- If the filter appears dirty or clogged, replace it with a new one.
- Ensure that the fuel filter is correctly installed before attempting to kickstart your scooter again.
A clean and unobstructed fuel filter is crucial for maintaining a steady flow of fuel to the engine, which is essential for a smooth kickstart.
Cleaning The Carburetor:
A malfunctioning carburetor can often be the reason behind a scooter’s refusal to kickstart. Cleaning the carburetor can help eliminate any fuel supply issues caused by dirt or residue buildup. Here’s how to clean your scooter’s carburetor:
- Begin by removing the carburetor from the scooter, following the manufacturer’s guidelines.
- Disassemble the carburetor and carefully clean each component with carburetor cleaner spray.
- Pay special attention to the jets, needle, and float bowl, as these areas are prone to buildup.
- Once all components are clean, reassemble the carburetor and reinstall it in your scooter.
By cleaning the carburetor, you’ll ensure that fuel is properly mixed with air, allowing for smooth combustion and kickstart operation.
Remember, diagnosing fuel supply issues requires patience and attention to detail. By inspecting the fuel line, checking the fuel filter, and cleaning the carburetor, you’ll be well on your way to resolving any fuel-related problems your scooter may be facing.
Resolving Battery-Related Problems
Resolve scooter kick-start issues with these effective tips. Troubleshoot common battery-related problems easily and get your scooter up and running in no time.
Is your scooter giving you a hard time kickstarting? One common culprit behind this issue is a battery problem. Don’t worry, we’ve got you covered! In this section, we will take a look at how to resolve battery-related problems. Whether you need to verify the battery charge or replace it altogether, we’ve got some practical solutions for you.
Let’s get started!
Verifying The Battery Charge
To determine if your scooter’s battery is contributing to the kickstarting issue, you can follow these steps:
- Ensure the ignition is off and remove any key from the scooter.
- Set the multimeter to DC voltage and connect the positive (red) probe to the battery’s positive terminal.
- Connect the negative (black) probe to the battery’s negative terminal.
- Check the multimeter display for the battery’s voltage reading.
If the voltage reading falls below the manufacturer’s recommended level, it’s likely that your battery needs charging or replacing. Don’t worry, we’ll cover both scenarios shortly!
Testing The Voltage
If you suspect that a fully charged battery is not the root cause of your kickstarting problem, you can test the battery’s voltage. Here’s how:
- Start by ensuring the ignition is off and no keys are in the scooter.
- Set your multimeter to DC voltage and connect the positive (red) probe to the battery’s positive terminal.
- Connect the negative (black) probe to the battery’s negative terminal.
- Kickstart the scooter and observe the multimeter display for any changes in voltage.
- If the voltage drops significantly or fluctuates during the kickstart, it may indicate a battery-related issue.
Keep in mind that a drop in voltage during kickstarting can also occur due to other problems, such as a faulty starter motor or ignition system. If you suspect these issues, it may be best to consult a professional.
Replacing The Battery
If you’ve determined that your scooter’s battery is the cause of the kickstarting problem, it’s time to replace it. Here’s a step-by-step guide to help you through the process:
- Start by ensuring the scooter is turned off and remove any keys from the ignition.
- Locate the battery compartment, which is typically located beneath the scooter’s seat or in the storage compartment.
- Remove any fasteners or covers securing the battery compartment.
- Carefully disconnect the cables attached to the battery terminals, starting with the negative (black) cable followed by the positive (red) cable.
- Remove the old battery from its compartment.
- Insert the new battery into the compartment, making sure it is securely positioned.
- Connect the positive (red) cable to the positive battery terminal and the negative (black) cable to the negative terminal.
- Double-check that all connections are secure and free of any debris.
- Replace any fasteners or covers that were removed earlier to secure the battery compartment.
- You can now turn on the scooter and attempt to kickstart it. Hopefully, a new battery will solve the kickstarting issue.
Remember, if you’re uncertain or uncomfortable with replacing the battery yourself, it’s always wise to seek assistance from a professional mechanic or scooter technician.
By following these steps, you can effectively troubleshoot and resolve battery-related problems that may be causing your scooter to resist kickstarting. Don’t let a weak battery stop you from hitting the road with your scooter adventures! Take charge, test the voltage, and replace the battery if necessary – and you’ll be back on two wheels in no time.
Safe travels!
Additional Steps For Efficient Troubleshooting
Efficient troubleshooting for a scooter that won’t kickstart includes checking the fuel level, inspecting the spark plug, cleaning the carburetor, and ensuring the ignition switch is working properly. By following these additional steps, you can identify and fix the issue quickly.
Scooter Wont Kickstart:
Having trouble starting your scooter? Don’t worry, we’ve got you covered with some additional troubleshooting steps to help get your scooter back on the road. In this section, we will focus on testing the ignition switch, evaluating the starter motor, and inspecting the wiring connections.
Testing The Ignition Switch
Is your scooter’s ignition switch working properly? To find out, follow these steps:
- Check for any signs of damage or corrosion on the ignition switch.
- Ensure the switch is in the “on” position.
- Use a multimeter to test the continuity of the switch.
- If the switch is faulty, consider replacing it with a new one.
Evaluating The Starter Motor
A malfunctioning starter motor can prevent your scooter from kickstarting. Here’s how you can evaluate the starter motor:
- Look for any loose or disconnected wires in the starter motor.
- Check the brushes and commutator for wear and tear.
- Test the motor’s resistance using a multimeter.
- If the motor fails these tests, it may be time to replace it.
Inspecting The Wiring Connections
Faulty wiring connections can cause issues with kickstarting your scooter. Follow these steps to inspect the wiring connections:
- Check for loose or disconnected wires around the battery and ignition system.
- Look for any signs of damage or corrosion on the wires.
- Ensure all connections are properly tightened and secure.
- If necessary, clean or replace any corroded connectors.
Remember, troubleshooting your scooter may require some technical knowledge. If you’re not confident in your abilities, it’s always best to consult a professional mechanic. By following these additional steps, you can efficiently troubleshoot and resolve kickstarting issues with your scooter.
Consult A Professional Mechanic
If your scooter won’t kickstart, it’s best to consult a professional mechanic. They have the expertise to diagnose and fix the issue, ensuring your scooter is back up and running smoothly.
When To Seek Professional Help
If you’ve tried various troubleshooting steps and your scooter still won’t kickstart, it may be time to consult a professional mechanic. While some minor issues can be resolved with DIY methods, certain situations require the expertise of a qualified mechanic.
Here are some key indicators for when it’s appropriate to seek professional help:
- Persistent starting problems: If your scooter consistently fails to kickstart despite your best efforts, it’s a sign that there may be an underlying issue that needs professional attention. A mechanic can diagnose the problem using specialized tools and equipment.
- Unusual noises or vibrations: If you notice any strange noises or vibrations when trying to kickstart your scooter, it’s wise to have a mechanic take a look. These could be signs of internal mechanical issues that require expert repair.
- Fluid leaks: If you observe any fluid leaks, such as oil or fuel, it’s crucial to have it assessed by a professional mechanic. Leaks can indicate damaged seals, gaskets, or other components that require proper diagnosis and repair.
- Electrical problems: If your scooter’s electrical system is malfunctioning, it can prevent normal kickstarting. Issues such as a faulty ignition switch or a depleted battery may require the expertise of an experienced mechanic.
- Safety concerns: If you suspect any safety-related problems, such as brake issues or steering instability, it’s essential to have them addressed by a professional mechanic promptly. These issues can compromise your safety and require specialized knowledge for proper resolution.
Finding a Reliable Scooter Mechanic:
When seeking professional help for your scooter, it’s crucial to find a reliable and experienced mechanic who can diagnose and fix the problem efficiently. Consider the following factors when choosing a scooter mechanic:
- Qualifications and expertise: Look for mechanics with relevant certifications, training, and experience in working with scooters. A mechanic who specializes in scooters will likely have in-depth knowledge about common issues and specific models.
- Reputation and reviews: Check online reviews and ask for recommendations from fellow riders to gauge the mechanic’s reputation. Positive reviews and testimonials are an indicator of their professionalism and reliability.
- Affordability: Compare prices between different mechanics in your area to ensure you’re getting a fair deal. However, keep in mind that the cheapest option might not always provide the best quality service.
- Convenience and location: Choose a mechanic who is conveniently located and easily accessible. This makes it more convenient for you to drop off and pick up your scooter for repairs.
- Warranty and guarantees: Inquire about the mechanic’s warranty policy and guarantees for their work. A reliable mechanic should stand behind their services and offer warranties for parts and labor.
Remember, not all scooter starting issues require professional intervention. However, when in doubt or facing persistent problems, it’s best to consult a professional mechanic to ensure the proper functioning and longevity of your scooter.
General Maintenance Tips To Prevent Future Issues
To prevent future issues with your scooter not kicking-start, follow these general maintenance tips. Regularly clean the carburetor, check the spark plug, ensure proper fuel mixture, inspect the kickstart lever, and keep the battery charged. This will help keep your scooter running smoothly and avoid any kickstart problems in the future.
Regularly Cleaning And Lubricating:
- Proper cleaning and lubrication of your scooter can significantly extend its lifespan and prevent future issues. Here are some tips to keep in mind:
- Cleaning the Scooter:
- Gently wash the scooter with mild soap and warm water, ensuring that you remove any dirt, debris, or grime.
- Use a soft cloth or sponge to clean the scooter’s exterior, including the handlebars, seat, and wheels.
- Be cautious not to expose any electrical components to water, as this can cause damage.
- Wipe the scooter dry with a clean cloth to prevent moisture from accumulating.
- Lubricating the Moving Parts:
- Apply a silicone-based lubricant to the scooter’s moving parts, such as the throttle, brake cables, and hinges.
- This helps to ensure smooth operation and reduces friction that could lead to wear and tear.
- Avoid using petroleum-based lubricants as they can attract dirt and cause further issues.
- Inspecting the Scooter Regularly:
- Conduct routine inspections of the scooter’s components, such as the brakes, tires, and chain.
- Check for any signs of wear or damage, and promptly address any issues to prevent them from escalating.
- Keep an eye out for loose or missing screws or bolts and tighten or replace them as needed.
- Maintaining the Battery:
- If your scooter has a removable battery, ensure it is properly charged and stored when not in use.
- Follow the manufacturer’s instructions for charging and storing the battery to prevent any complications.
- Clean the battery terminals periodically to remove any corrosion and maintain optimal performance.
Proper maintenance through regular cleaning and lubrication is crucial for preventing future issues with your scooter. By investing a small amount of time into these tasks, you can keep your scooter running smoothly and enjoy uninterrupted rides for years to come.
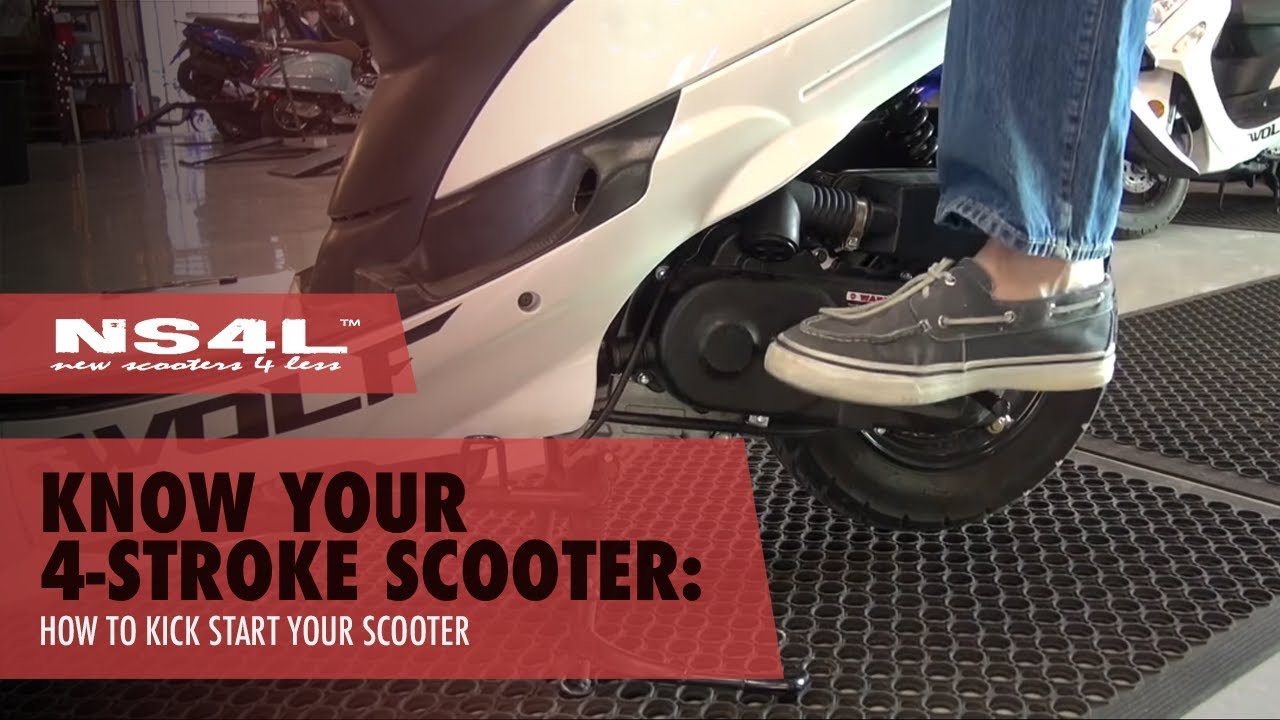
Credit: m.youtube.com
Frequently Asked Questions For Scooter Wont Kickstart
Why Is My Kick Starter Not Working?
Your kick starter may not be working due to issues with the ignition switch or wiring connections.
Why Is My Scooty Not Starting With Kick?
If your scooty is not starting with the kick, it may have issues with the spark plug or fuel supply.
Why Is My Kickstart Motorcycle Not Working?
Your kickstart motorcycle might not be working due to a faulty ignition system or fuel-related issues.
How Do You Start A Bike With A Broken Kick Start?
To start a bike with a broken kick start, use the clutch to push start it.
Conclusion
Troubleshooting a scooter that won’t kickstart can be a frustrating experience. However, by following the steps outlined in this blog post, you can effectively identify and address the underlying issues. Make sure to check the fuel system, ignition system, and mechanical components to pinpoint the problem area.
Cleaning the carburetor, replacing the spark plug, and inspecting the kickstart mechanism are common solutions that can get your scooter up and running again. It’s also important to remember to take necessary safety precautions and consult with a professional if needed.
By being proactive and knowledgeable about your scooter’s mechanics, you can save time and money in the long run. So don’t let a non-starting scooter dampen your spirits; with the right troubleshooting techniques, you’ll be back on the road in no time.