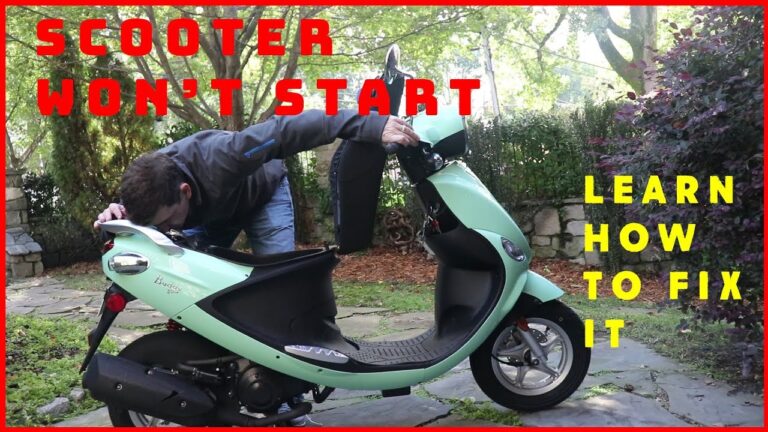
Scooter Not Self Starting : Troubleshoot Your Ride

If your scooter is not self-starting, it could be due to a faulty ignition switch or a dead battery. Read on to troubleshoot and fix common self-starting issues with your scooter.
Welcome to our guide on troubleshooting and fixing self-starting issues with your scooter. If you’re experiencing problems with your scooter not self-starting, it can be frustrating and inconvenient. However, there are a few common reasons why this may be happening.
The most common culprits are a faulty ignition switch or a dead battery. In this guide, we will walk you through the steps to diagnose and fix these issues so you can get your scooter up and running smoothly again. By following these simple troubleshooting tips, you can save time and money by avoiding unnecessary repairs. Let’s get started.
Understanding The Issue
Having trouble with your scooter not self-starting? Learn the possible causes and solutions to understand and fix the issue effectively. Save time and money by troubleshooting the problem yourself with these helpful tips.
Is your scooter refusing to start on its own? If you’re experiencing this frustrating problem, it’s crucial to troubleshoot it quickly. Understanding the possible reasons why your scooter is not self-starting and the importance of addressing the issue promptly will ensure that you can get back on the road as soon as possible.
Possible Reasons For Scooter Not Self-Starting:
- Dead battery: A depleted battery is one of the most common causes of a scooter not self-starting. When the battery doesn’t have enough power, it becomes difficult for the scooter to kickstart. Consider checking the battery voltage using a voltmeter or seeking professional help to recharge or replace the battery if needed.
- Faulty starter relay: The starter relay is responsible for transmitting the electrical current from the battery to the starter motor. If the relay is defective or damaged, it can prevent the scooter from self-starting. Inspect the relay for any signs of malfunction and have it replaced if necessary.
- Ignition switch issues: A malfunctioning ignition switch can also be a culprit behind the self-starting problem. If the switch fails to properly engage or send the necessary signals to the scooter’s electrical system, it can prevent the scooter from starting. Consider inspecting the ignition switch for any visible damage or contacting a professional to diagnose and fix the issue.
- Clogged fuel system: A clogged fuel system can disrupt the flow of gasoline to the engine, hindering the scooter’s ability to self-start. Check the fuel filter and fuel lines for any obstructions or blockages. Cleaning or replacing the fuel filter and unclogging the fuel lines can potentially resolve the issue.
- Faulty spark plug: A faulty spark plug can cause ignition problems and prevent the scooter from self-starting. Inspect the spark plug for signs of wear, damage, or fouling. If necessary, replace the spark plug to ensure proper ignition.
Importance Of Troubleshooting The Problem Quickly:
- Avoid inconvenience: Addressing the self-starting issue promptly will save you from the inconvenience of having to manually kickstart the scooter every time you want to use it. Having a scooter that self-starts will make your rides smoother and more convenient.
- Prevent further damage: Ignoring the self-starting problem could lead to more significant damage to the scooter. By troubleshooting the issue quickly, you can identify and fix any underlying problems, preventing them from causing further damage to crucial components.
- Save time and money: Tackling the self-starting issue early on can save you time and money in the long run. By pinpointing and resolving the problem promptly, you can prevent more complex and costly repairs down the line.
- Ensure safety: A scooter that doesn’t self-start might leave you stranded in inconvenient or unsafe locations. By troubleshooting the issue quickly, you can ensure that your scooter is in optimal working condition, reducing the risk of unexpected breakdowns.
By understanding the potential causes of a scooter not self-starting and recognizing the importance of troubleshooting the problem promptly, you can take the necessary steps to get your scooter back up and running smoothly. Don’t delay in addressing the issue and enjoy the hassle-free rides you deserve.
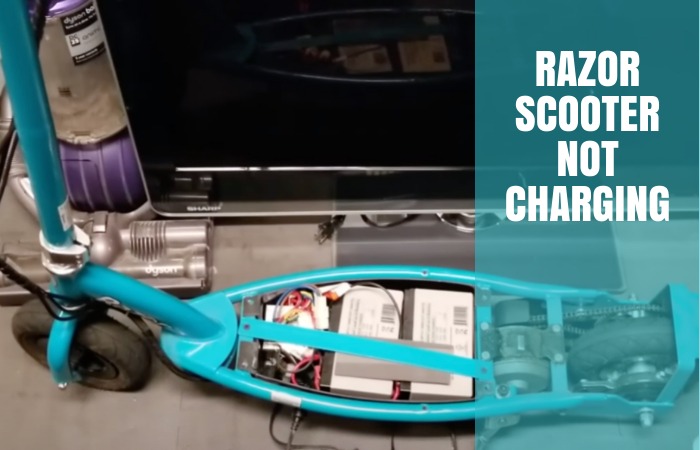
Checking The Battery
To check the battery on your scooter if it’s not self-starting, first, inspect the battery terminals for any corrosion or loose connections. Then, use a multimeter to test the battery voltage and ensure it meets the manufacturer’s specifications. Additionally, check the fuse and wiring for any faults that may be causing the self-starting issue.
Regular battery maintenance can help prevent such problems in the future.
Scooter Not Self Starting:
Have you ever encountered the frustrating situation where your scooter refuses to start? One of the possible culprits could be a faulty or drained battery. In order to diagnose the issue and determine if the battery is to blame, follow these simple steps to check the battery voltage.
Testing The Battery Voltage:
- Begin by locating the battery compartment on your scooter.
- Use a voltmeter to measure the voltage of the battery. Make sure the voltmeter is set to the appropriate voltage range.
- Connect the positive (red) lead of the voltmeter to the positive terminal of the battery.
- Connect the negative (black) lead of the voltmeter to the negative terminal of the battery.
- Read the voltage displayed on the voltmeter. A fully charged battery typically has a voltage reading between 12.6 and 12.8 volts. If the voltage is significantly lower than this, it may indicate a problem with the battery.
Replacing Or Recharging The Battery If Necessary:
If the battery voltage is below the recommended range, it may need to be replaced or recharged. Consider the following options:
- Recharging the battery:
- Connect the battery to a charger specifically designed for scooter batteries.
- Follow the manufacturer’s instructions for charging time and voltage.
- Monitor the charging process and ensure the battery reaches the required voltage.
- Replacing the battery:
- Obtain a compatible replacement battery for your scooter.
- Disconnect the cables connected to the old battery, starting with the negative cable followed by the positive cable.
- Remove the old battery from the compartment.
- Insert the new battery into the compartment, ensuring the positive and negative terminals align correctly.
- Reconnect the cables, starting with the positive cable followed by the negative cable.
Remember, a poorly functioning or dead battery can prevent your scooter from starting. By testing the battery voltage and taking appropriate action, you can rectify this issue and get back on the road in no time.
Inspecting The Ignition System
Inspecting the ignition system is crucial when your scooter does not self-start. Ensure each component is functioning properly to diagnose the underlying issue and restore the scooter’s starting capability.
If your scooter is not starting on its own, it could be due to a problem with the ignition system. The ignition system is responsible for generating the spark that ignites the fuel in the engine, and any issues with this system can prevent your scooter from starting properly.
In this section, we will discuss how to inspect the ignition system and identify potential problems.
Checking The Spark Plug:
- Start by removing the spark plug from the engine.
- Inspect the spark plug for any signs of damage or fouling.
- Look for carbon deposits, worn electrodes, or cracks in the ceramic insulator.
- Clean the spark plug if necessary or replace it if damaged.
- Ensure the spark plug is gapped correctly according to the manufacturer’s specifications.
- Reinstall the spark plug and securely tighten it.
Testing The Ignition Coil:
- Locate the ignition coil, usually found near the spark plug.
- Disconnect the spark plug wire from the ignition coil.
- Use a multimeter to measure the resistance of the ignition coil.
- Check the manufacturer’s specifications for the recommended resistance range.
- If the resistance is outside the specified range, replace the ignition coil.
- Reconnect the spark plug wire to the ignition coil.
By following these steps and inspecting the ignition system thoroughly, you can identify any issues that may be causing your scooter’s self-starting problem. Remember to always refer to the manufacturer’s guidelines for specific information regarding your scooter’s ignition system.
Examining The Fuel System
Examine your scooter’s fuel system to troubleshoot why it is not self-starting. Check for clogged fuel filters, faulty fuel pumps, or dirty carburetors that may be hindering proper fuel flow and preventing your scooter from starting. Ensure a smooth ride by addressing these fuel system issues.
If your scooter is not self-starting, the issue could lie within the fuel system. Understanding the fuel system and knowing what to check can help you diagnose and fix the problem. In this section, we will examine the fuel system and look at two key areas that could be causing the self-starting issue: checking the fuel level and inspecting the fuel lines and filter.
Checking The Fuel Level
To start your investigation, it’s essential to ensure that your scooter has enough fuel. Here’s what you need to do:
- Look at the fuel gauge: Check if the fuel gauge indicates that the tank is empty or low. If so, you may need to refuel.
- Open the fuel tank: Unscrew the fuel tank cap and visually inspect the fuel level. It should be close to the top. If it’s low, you’ll need to fill it up with the appropriate fuel.
- Refill if necessary: If you determine that the fuel level is low, find a nearby gas station and refill the tank with the recommended fuel type for your scooter.
Inspecting The Fuel Lines And Filter
Another area to examine is the fuel lines and filter. Any blockage or damage in these components can hinder the fuel flow and affect the self-starting mechanism. Here’s what you can do:
- Follow the fuel line: Trace the fuel line from the fuel tank to the carburetor or fuel injector. Inspect the entire length of the line for any signs of damage, such as cracks or leaks.
- Check the fuel filter: Locate the fuel filter along the fuel line, usually near the carburetor. Remove the filter and inspect it for any clogs or debris. If the filter is dirty or damaged, it may need cleaning or replacement.
- Clean or replace the filter: If you notice any clogs or debris in the filter, clean it thoroughly using compressed air or a suitable cleaning solution. If the filter is damaged or excessively dirty, it’s best to replace it with a new one.
By checking the fuel level and inspecting the fuel lines and filter, you can identify potential issues within the fuel system that may be causing your scooter’s self-starting problem. Remember to address any fuel-related issues promptly to ensure optimal scooter performance.
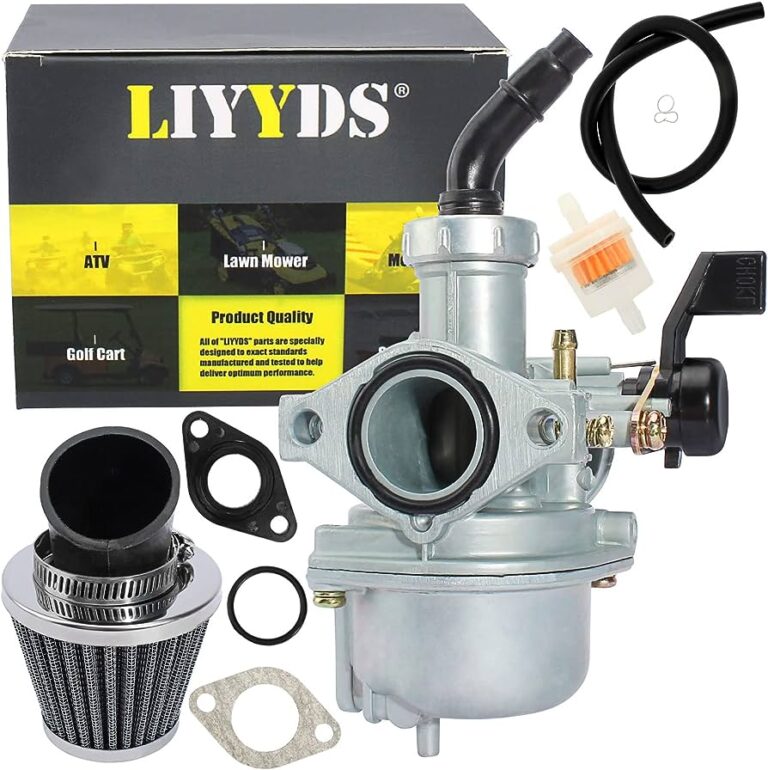
Diagnosing The Carburetor
Diagnosing the carburetor is essential when your scooter is not self-starting. Identify potential issues such as clogged jets, a faulty fuel pump, or a disrupted airflow to get your scooter running smoothly again.
If your scooter is experiencing difficulties in starting up, it could be due to issues with the carburetor. The carburetor plays a crucial role in delivering the optimal fuel-air mixture to the engine for ignition. When it malfunctions, it can lead to starting problems.
To diagnose and address these concerns, follow the steps below:
Cleaning The Carburetor:
- Remove the carburetor from the scooter.
- Disassemble the carburetor by carefully removing all its components.
- Use carburetor cleaner to thoroughly clean each part, ensuring any dirt, debris or residue is removed.
- Pay close attention to the small passages and jets, ensuring they are completely clear.
- Reassemble the carburetor, making sure all components are properly fitted and secured.
Adjusting The Idle Speed:
- Locate the idle speed screw on the carburetor. It is usually marked with the letter “I” or a symbol resembling a sideways T.
- Start the engine and allow it to warm up.
- Gently turn the idle speed screw clockwise to increase the idle speed or counterclockwise to decrease it.
- Monitor the engine and adjust the screw until the proper idle speed is achieved. This can typically be found in the owner’s manual or online.
- Ensure the idle speed is stable and the engine is not stalling or revving too high.
By cleaning the carburetor and adjusting the idle speed, you can alleviate starting issues and improve the overall performance of your scooter. These steps are relatively simple to execute and can save you time and money by avoiding unnecessary visits to a mechanic.
Remember to consult your scooter’s manual for specific instructions, as each model may have its own unique carburetor setup.
Evaluating The Starter Motor
Having trouble with your scooter not self-starting? Evaluating the starter motor can help diagnose the issue and get your scooter back on the road.
Scooters are a convenient mode of transportation, but it can be frustrating when your scooter fails to start. If you’re facing this issue, it’s essential to evaluate the starter motor. Here are some ways to test and, if necessary, replace or repair the starter motor.
Testing The Starter Motor:
- Inspect the connections: Start by examining the electrical connections leading to the starter motor. Check for loose or corroded wires, as these can hinder the motor’s performance.
- Check the battery voltage: Ensure that the scooter’s battery has enough voltage to power the starter motor. Low battery voltage can prevent the motor from starting. Use a voltmeter to measure the battery’s voltage accurately.
- Listen for unusual sounds: When you try to start the scooter, listen for any strange noises coming from the starter motor. Unusual sounds could indicate a worn-out or damaged motor that needs to be replaced.
- Use a jumper wire: If you suspect that the starter motor is the issue, you can bypass the wiring and directly test the motor. Connect a jumper wire from the positive terminal of the battery to the connector on the starter motor. If the motor spins when bypassing the wiring, this indicates a problem with the scooter’s wiring rather than the motor itself.
Replacing Or Repairing The Starter Motor If Needed:
- Consult the owner’s manual: Check the manufacturer’s guidelines to determine if the starter motor is replaceable or repairable. Some scooters allow for easy replacement, while others may require professional help.
- Remove the faulty motor: If you’re capable of replacing the starter motor, start by disconnecting the battery’s negative terminal. Remove any components obstructing access to the motor, such as the battery or airbox. Carefully detach the motor from the scooter, following the manufacturer’s instructions.
- Install a new motor: If the motor is replaceable, acquire a compatible starter motor from a reputable supplier. Install the new motor by reversing the steps taken to remove the faulty one. Ensure all connections are secure and the motor is properly aligned.
- Professional assistance: If you’re unsure about replacing or repairing the starter motor, it’s best to seek professional help. A trained technician can assess the issue accurately and provide the necessary repairs or replacements.
Remember, the starter motor plays a vital role in getting your scooter up and running. By testing and, if required, replacing or repairing the starter motor, you can resolve the self-starting issue and enjoy your scooter’s smooth operation once again.
Verifying The Wiring Connections
To troubleshoot a scooter that isn’t self-starting, verifying the wiring connections is crucial. Ensure all electrical connections are secure and properly connected to identify any faults that may be preventing the scooter from starting.
Scooter Not Self Starting:
Have you ever experienced the frustration of trying to start your scooter, only to find that it’s not responding? One of the most common reasons for a scooter’s self-starting failure is faulty wiring connections. The wiring connections are crucial as they ensure the proper transfer of power from the battery to the ignition system.
Let’s dive into the necessary steps to verify the wiring connections and get to the root of the problem.
Ensuring Proper Connection Between The Battery And Ignition System:
- Check the positive and negative terminals of the battery: Verify that the battery is securely connected to the scooter’s electrical system.
- Inspect for loose wires: Examine all the wiring connections for any signs of loose or detached wires. Loose connections can interfere with the smooth flow of electrical current and prevent the self-start function from working.
- Evaluate the wiring harness: Scrutinize the wiring harness for any signs of wear and tear. Damaged wiring can cause short circuits or interruptions in the power supply, hindering the scooter’s self-starting mechanism.
- Examine the fuse box: Check the fuse box to ensure that all the fuses are in proper working condition. A blown fuse can disrupt the electrical circuit and impede the self-start operation.
- Test the ignition switch: Verify if the ignition switch is functioning correctly. A faulty switch may prevent the scooter from starting, even if all the wiring connections are intact.
Checking for any loose or damaged wires is vital to rectifying a scooter that refuses to self-start. By adhering to the above steps, you can pinpoint any wiring issues and address them appropriately. Remember, always exercise caution when dealing with electrical components and seek professional assistance if necessary.
Now that we’ve covered the wiring connections, we can move on to troubleshooting other potential causes for a non-self-starting scooter.
Addressing Other Potential Issues
To address the issue of a scooter not self-starting, it’s important to troubleshoot potential causes such as a faulty battery, loose connections, or a faulty ignition switch. By addressing these issues, you can get your scooter back up and running smoothly.
Have you ever experienced the frustration of a scooter that refuses to start? It can be quite a setback, especially if you’re in a hurry or rely on your scooter for daily transportation. While a non-starting scooter can be caused by several factors, addressing other potential issues can help you get back on the road in no time.
Here are a few areas to investigate and troubleshoot:
Investigating The Kill Switch:
- The kill switch, also known as the engine cutoff switch, could be accidentally engaged, preventing the scooter from starting.
- To investigate, locate the kill switch usually found on the handlebars near the throttle. Make sure it is in the “on” or “run” position.
- If the kill switch is in the correct position, try toggling it a few times to ensure it is not stuck or malfunctioning.
- Finally, check the wiring connected to the kill switch for any signs of damage or loose connections that may be causing the issue.
Checking The Kickstand Safety Switch:
- The kickstand safety switch is designed to prevent the scooter from starting when the kickstand is down, ensuring rider safety.
- Verify that the kickstand is fully retracted and securely latched in the up position.
- If the kickstand is up and the scooter still won’t start, examine the kickstand safety switch for any visible damage or loose wiring.
- Ensure that the switch is functioning correctly by moving the kickstand up and down while trying to start the scooter. Listen for any audible clicks or changes that may indicate a faulty switch.
Resolving these potential issues can often rectify a scooter that is not self-starting. By investigating the kill switch and checking the kickstand safety switch, you can troubleshoot common culprits and potentially save yourself a trip to the repair shop. However, if these steps do not resolve the problem, it may be necessary to seek professional assistance.
Remember, the key to getting your scooter back on track is understanding and addressing these other potential issues.
Seeking Professional Help
Having trouble with your scooter not self-starting? Seek professional help to diagnose and fix the issue efficiently. Expert technicians can provide the necessary assistance to get your scooter back on the road in no time.
Scooter Not Self Starting –
Having trouble starting your scooter? No worries, we’ve got you covered. While some self-starting issues can be fixed at home, there are times when it’s best to seek professional help. In this section, we’ll outline when to reach out to a mechanic and emphasize the importance of regular maintenance to avoid future problems.
When To Reach Out To A Mechanic
If your scooter fails to self-start after addressing basic troubleshooting steps, it’s time to involve a professional. Here are a few instances when seeking a mechanic’s assistance becomes necessary:
- Persistent Starting Issues: When your scooter consistently fails to self-start, despite trying various troubleshooting methods, a mechanic’s expertise is vital to pinpoint the root cause of the problem.
- Electrical Problems: If you suspect a malfunction in the electrical system, such as a faulty ignition switch or a dead battery, a mechanic will have the necessary tools and knowledge to resolve the issue safely.
- Engine-related Complications: Scooters with engine-related problems, such as a faulty starter motor or carburetor issues, often require specialized knowledge and tools to diagnose and fix. A mechanic’s expertise can save you time and frustration.
- Warranty Coverage: If your scooter is still under warranty, attempting to fix it yourself may void the warranty. It’s best to consult a professional to address the problem while preserving the warranty benefits.
Remember, a reliable mechanic can diagnose and repair the underlying cause of your self-starting issues efficiently, ensuring optimal performance and peace of mind.
Importance Of Regular Maintenance
Regular maintenance plays a crucial role in keeping your scooter in top-notch condition. By adhering to a maintenance schedule, you can prevent self-starting issues and other potential problems. Here’s why regular maintenance is important:
- Prolonged Lifespan: Regular check-ups, oil changes, and inspections can greatly extend the lifespan of your scooter, reducing the likelihood of self-starting problems and other malfunctions.
- Improved Performance: Routine maintenance, such as cleaning or replacing the air filter, ensures efficient airflow to the engine, optimizing scooter performance and enhancing self-starting functionality.
- Safety Assurance: Regular inspections pinpoint potential issues before they escalate, thereby minimizing the risk of sudden breakdowns or accidents, ensuring a safe riding experience.
- Cost Savings: Investing in regular maintenance may seem like an additional expense; however, it saves you from expensive repairs in the long run. Identifying and addressing minor issues early on can prevent major breakdowns and costly repairs.
By establishing a maintenance routine and adhering to it diligently, you can minimize self-starting problems and enhance the overall performance of your scooter.
Remember, while minor self-starting issues can be resolved at home, seeking professional help is crucial when the problem persists, or electrical or engine-related complications arise. Additionally, regular maintenance is an essential aspect of keeping your scooter in excellent condition and preventing self-starting issues from occurring in the first place.

Credit: www.cnet.com
Frequently Asked Questions For Scooter Not Self Starting
Why Does My Electric Scooter Have Power But Wont Start?
Your electric scooter may not start despite having power due to a potential issue.
Why Does My Scooter Refuse To Start In The Mornings?
Your scooter may not start in the mornings due to issues with the battery or fuel system.
Why Does My Moped Not Start Sometimes?
Sometimes, mopeds fail to start due to issues with the fuel or spark plug. Check them to identify the problem.
Where Is The Starter Relay On A Scooter?
The starter relay on a scooter is typically located near the battery or under the seat.
Conclusion
To sum up, if you find that your scooter is not self-starting, there are a few potential reasons for this issue. It could be due to a weak battery, a faulty ignition switch, a clogged fuel line, or a faulty starter motor.
It’s crucial to diagnose the exact cause of the problem before attempting any repairs or replacements. By following the troubleshooting steps mentioned in this blog post, you can narrow down the issue and take appropriate action to fix it. Remember to regularly maintain your scooter and keep an eye on its electrical and mechanical components.
This will not only ensure a smooth and hassle-free riding experience but also increase the lifespan of your scooter. Don’t hesitate to reach out to a professional mechanic if you’re unsure or if the problem persists. Keep your scooter in top shape and enjoy the convenience and freedom it provides.