Razor Scooter Not Charging: Here’s How to Fix It
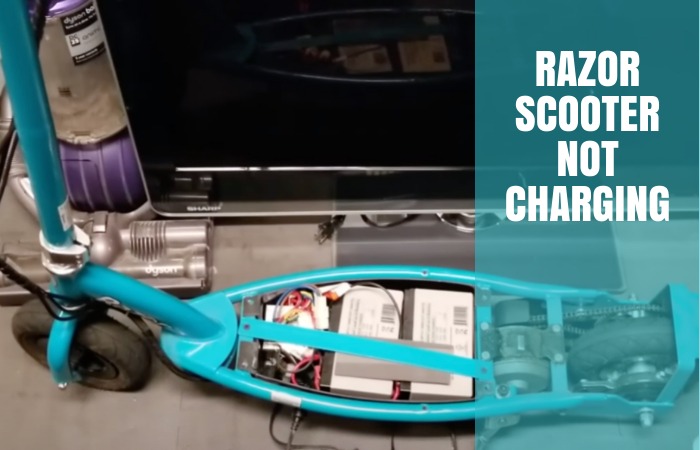
When it comes to a Razor scooter not charging, always check to make sure the charger is plugged into the charger port correctly and that the lights on the charger are working properly when charging. The unit should be charged for 12 hours before the first initial use and up to 8 hours after each subsequent use.
If the scooter still won’t charge, you may need to troubleshoot further or consider buying replacement parts.
Troubleshooting Guide For Razor Scooter Charging Issues
If you’re experiencing charging issues with your Razor scooter, check if the charger is properly plugged into the charger port and if the lights on the charger are functioning correctly. It’s important to charge the unit for 12 hours before initial use and up to 8 hours after each subsequent use.
If you’re facing issues with your Razor scooter not charging, don’t worry – we’ve got you covered. In this troubleshooting guide, we’ll walk you through the steps to identify and resolve the common charging problems you may encounter. Let’s dive in!
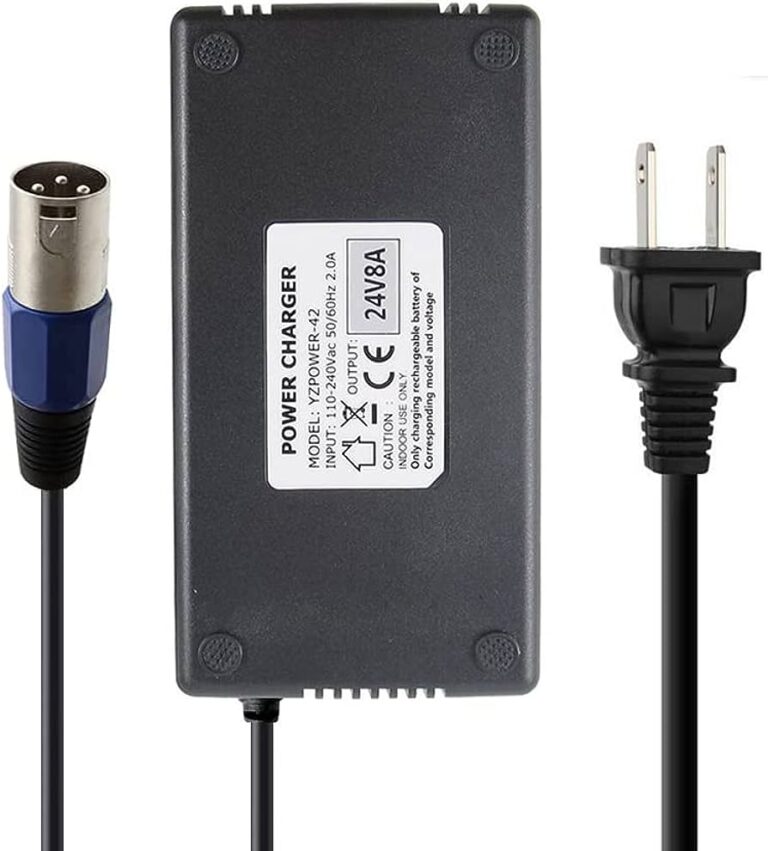
Checking The Charger With A Multimeter:
- Use a multimeter to check if the charger is functioning properly.
- Set the multimeter to DC voltage mode.
- Connect the charger to an electrical outlet.
- Place the multimeter probes on the charger’s output plug.
- Check if the voltage reading on the multimeter matches the charger’s rating.
- If the reading is significantly lower or zero, it indicates a faulty charger that needs replacement.
Understanding Battery Installation:
- Make sure the batteries are properly installed in the scooter.
- Refer to the user manual for the correct battery placement.
- Ensure the battery terminals are securely connected.
- Check for any loose connections or corrosion on the battery terminals.
- Clean the terminals if necessary and tighten any loose connections.
Testing The Battery Sensor:
- The battery sensor ensures proper charging and prevents overcharging of the batteries.
- Use a multimeter to test the battery sensor’s functionality.
- Set the multimeter to resistance mode.
- Disconnect the battery from the scooter.
- Connect the multimeter probes to the battery sensor terminals.
- Check if the reading on the multimeter shows the expected resistance value.
- If the reading is significantly off or shows an open circuit, the battery sensor may be faulty and needs replacement.
Diagnosing A Fried Motor:
- A fried motor can also cause charging issues.
- Listen for any unusual sounds or grinding noises when the scooter is turned on.
- Check if the motor is getting hot during operation.
- If the motor shows signs of damage or is malfunctioning, it may need to be replaced.
Checking The Batteries:
- Inspect the batteries for any visible damage or leakage.
- Measure the voltage of each battery using a multimeter.
- If the voltage reading is below the recommended level, the batteries may need to be recharged or replaced.
Exploring Other Possible Reasons For The Charging Issue:
- Ensure that the charging port on the scooter is clean and free from any debris.
- Check the power outlet you are using to charge the scooter. Try using a different outlet to see if it makes a difference.
- Inspect the charging cable for any signs of damage or fraying. Replace it if necessary.
- Consider resetting the scooter by disconnecting the batteries and reconnecting them after a few minutes.
- If you’ve tried all the troubleshooting steps and the scooter still doesn’t charge, you may need to seek professional assistance or contact Razor’s customer support for further guidance.
Remember, these troubleshooting steps aim to help you identify and resolve common charging issues with your Razor scooter. With a little patience and careful inspection, you’ll be back on the go in no time.

Credit: old.varlascooter.com
Quick Fix: Common Reasons Why Razor Scooters Don’t Charge
If your Razor scooter is not charging, there could be a few common reasons. Make sure the charger is properly plugged in and the charger lights are functioning. It’s recommended to charge the scooter for 12 hours before the first use and up to 8 hours after each subsequent use.
Razor scooters are a popular choice for both kids and adults alike. However, it’s frustrating when your scooter doesn’t charge properly. If you’re experiencing this issue, don’t worry. There are several common reasons why a Razor scooter may not be charging.
In this section, we’ll explore these reasons and provide quick-fix solutions to get your scooter up and running again.
Plugging In The Charger Correctly
- Ensure that the charger is properly plugged into the scooter’s charging port.
- Verify that the charger is securely connected and not loose.
- Double-check that the charger is also properly plugged into a working power source.
Determining If The Scooter Is Actually Charging
- Look for a charging indicator light on the scooter or the charger. A solid light or an indication that the scooter is receiving power confirms that it’s charging.
- Test the charger with a multimeter to ensure it’s working correctly. Connect the multimeter probes to the charger’s output and check for voltage readings within the specified range.
Identifying Where To Find Information On Why It’S Not Charging
- Consult the scooter’s user manual for troubleshooting information. It should provide specific guidance on common charging issues.
- Visit the manufacturer’s website or contact their customer support for detailed instructions or troubleshooting guides.
Investigating The Possibility Of A Blown Fuse
- Locate the fuse box on your scooter. It’s usually situated near the battery compartment or under the foot deck.
- Open the fuse box and inspect the fuses for signs of damage or blown circuits. Replace any blown fuses with new ones of the same rating.
Bypassing The 5 Amp Fuse
- If you suspect the 5 amp fuse is causing the charging issue, carefully remove the fuse from the fuse box.
- Connect the charger directly to the battery terminals using alligator clips or a similar method. Take caution not to short-circuit or damage any components.
Hardwiring The Charger As A Solution
- As a last resort, you can consider hardwiring the charger to the scooter’s battery.
- Seek professional assistance or follow a detailed guide to ensure correct wiring and prevent any damage to your scooter.
Remember that these quick fixes are intended as temporary solutions. If your Razor scooter continues to have charging problems, it’s best to seek professional assistance or contact the manufacturer for further troubleshooting guidance. With a little effort and troubleshooting, you’ll hopefully have your scooter fully charged and ready for your next ride in no time.
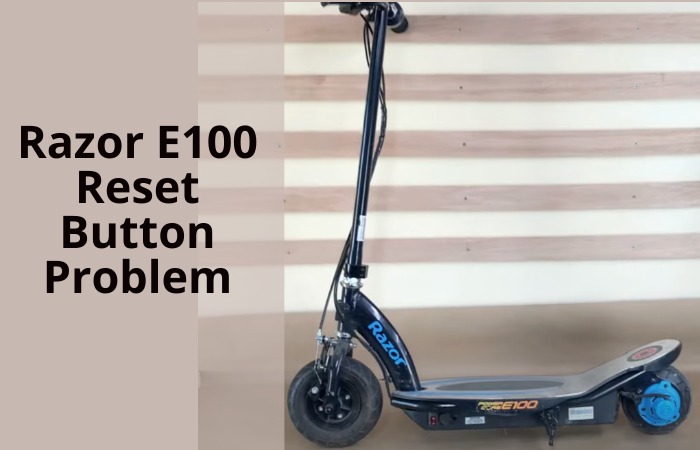
How To Repair An Electric Scooter: Troubleshooting The Razor E100
To troubleshoot a Razor E100 electric scooter not charging, start by checking if the charger is plugged in properly and the lights on the charger are working. Ensure the unit is charged for 12 hours prior to the first use and 8 hours after each subsequent use.
Is your Razor scooter not charging? Don’t worry, there are several troubleshooting steps you can take to identify and fix the issue. In this guide, we will walk you through each step to help you get your electric scooter back up and running.
Let’s get started!
Conducting A Continuity Test:
- A continuity test can help determine if there is a break in the electrical circuit. Here’s how you can conduct a continuity test:
- Turn off the scooter and unplug it from the power source.
- Set your multimeter to the continuity mode.
- Touch each probe of the multimeter to the corresponding wires or connectors. If there is continuity, it means the circuit is complete. If there is no continuity, there may be a break in the circuit that needs to be repaired.
Testing The Display:
- The display on your Razor E100 can provide valuable information about the scooter’s charging status. Here’s how you can test the display:
- Turn on the scooter and check if the display is working properly.
- If the display is blank or not showing the correct information, there may be an issue with the display itself or its connection to the rest of the scooter.
Checking The Controller Box:
- The controller box is responsible for regulating the electrical flow in your electric scooter. Here’s how you can check the controller box:
- Locate the controller box, which is usually located near the battery compartment.
- Inspect the controller box for any visible damage or loose connections.
- Test the controller box using a multimeter to ensure it is functioning correctly.
Disconnecting The Battery:
- Sometimes, disconnecting and reconnecting the battery can help reset the scooter’s electrical system. Here’s how you can do it:
- Turn off the scooter and unplug it from the power source.
- Locate the battery compartment and disconnect the battery cables.
- Leave the battery disconnected for a few minutes, then reconnect the cables.
Inspecting For Broken Wires:
- Broken wires can prevent the scooter from charging properly. Here’s how you can inspect for broken wires:
- Carefully examine all the wires and connectors in your scooter for any signs of damage or wear.
- If you find any broken or frayed wires, they will need to be repaired or replaced.
Testing The Throttle:
- A faulty throttle can also cause charging issues in your Razor E100. Here’s how you can test the throttle:
- Turn on the scooter and check if the throttle is responsive.
- If the throttle is unresponsive or not working correctly, it may need to be replaced.
Replacing The Throttle If Necessary:
- If testing the throttle reveals that it needs to be replaced, here’s how you can do it:
- Purchase a replacement throttle compatible with your Razor E100 model.
- Follow the manufacturer’s instructions to install the new throttle, ensuring all the connections are secure.
Troubleshooting The Brake Switch:
- The brake switch is a safety feature that can affect the charging of your electric scooter. Here’s how you can troubleshoot the brake switch:
- Check if the brake switch is engaging properly when the brake lever is pressed.
- If the brake switch is not engaging or is stuck, it may need to be adjusted or replaced.
By following these troubleshooting steps, you can identify and resolve the issue preventing your Razor E100 scooter from charging. Remember to always prioritize safety and consult the manufacturer’s instructions when making any repairs or replacements. Get ready to enjoy your electric scooter once again!
Frequently Asked Questions For Razor Scooter Not Charging
Why won’t my Razor Scooter Charge?
Make sure the charger is correctly plugged into the charger port and the lights on the charger are working. Charge the scooter for 12 hours before first use and up to 8 hours after each subsequent use.
How Do You Fix A Scooter That Is Not Charging?
To fix a scooter that is not charging, check the charger is connected properly and has functioning lights. Charge the scooter for 12 hours before initial use and up to 8 hours after each subsequent use.
Why Won’t My Scooter Battery Charge?
Make sure the charger is properly connected to the scooter and the charger lights are working. Charge for 12 hours before first use and up to 8 hours after each subsequent use.
How Do I Reset My Electric Razor Scooter?
To reset your electric Razor scooter, follow these steps: 1. Make sure the charger is properly plugged into the charger port and the lights on the charger are working. 2. Charge the scooter for 12 hours before the first use and up to 8 hours after each subsequent use.
Conclusion
To troubleshoot why your Razor scooter is not charging, there are several steps you can take. First, ensure that the charger is plugged into the charger port correctly and that the lights on the charger are working properly. It is also important to charge the scooter for at least 12 hours before initial use and up to 8 hours after each subsequent use.
If the scooter still does not charge, there may be other underlying issues. In this case, you can refer to online tutorials or seek professional help to diagnose the problem. Remember to check the battery, motor, controller box, throttle, and wiring for any potential damage or malfunctions.
By following these troubleshooting steps, you can determine the source of the charging problem and take the necessary steps to fix it. Enjoy your ride!