Why Does My Gotrax Scooter Not Turn on? Ultimate Troubleshooting Guide!

The Gotrax scooter may not turn on due to a dead battery or a faulty power switch. In such cases, check the battery connection or consider replacing the power switch.
(Introduction – 120 words) The Gotrax scooter is a popular electric scooter known for its convenience and eco-friendly features. However, you may encounter an issue where your scooter does not turn on. Understanding the possible reasons for this problem can help you troubleshoot and resolve the issue quickly.
One common reason is a dead battery, which can occur when the scooter has been used extensively without recharging. In this case, checking the battery connection and ensuring it is securely connected could potentially solve the problem. Another possibility is a malfunctioning power switch, which can prevent the scooter from turning on. If the battery appears to be fine, it is worth considering the option of replacing the power switch. By identifying and addressing these issues, you can get your Gotrax scooter up and running again.
Insufficient Charge
If your Gotrax scooter refuses to turn on, the problem might be an insufficient charge. Make sure to fully charge your scooter’s battery before attempting to use it.
Check Battery Indicator Lights
- Make sure to check the battery indicator lights on your Gotrax Scooter when it fails to turn on. These lights provide valuable information about the battery’s charge level and can help troubleshoot the issue.
- If the battery indicator lights are not illuminating at all, it is likely that your scooter’s battery is completely drained or faulty. In this case, you may need to replace the battery.
- On the other hand, if some of the battery indicator lights are on, but not all, it indicates that the battery is partially charged. In this scenario, the insufficient charge could be the reason why your scooter is not turning on.
- In case all the battery indicator lights are on, but your Gotrax Scooter still does not power up, the issue might lie elsewhere. Refer to the other sections of this blog post to explore other possible causes.
Charging Instructions And Tips
- Before attempting to charge your Gotrax Scooter, ensure that the charger is plugged into a functioning power outlet. Sometimes, the charger may appear to be connected properly, but there might be an issue with the outlet itself.
- Once you have confirmed the power source, plug the charger into the charging port of your scooter securely. Ensure that the connection is tight and free from any debris. Loose or dirty connections can prevent proper charging.
- Leave your Gotrax Scooter plugged in for a sufficient amount of time. Charging times may vary depending on the model and battery capacity. Refer to your scooter’s user manual for estimated charging times.
- It is essential to keep your scooter in a cool and dry place while charging. Avoid exposing it to extreme temperatures or moisture, as these conditions can adversely affect the charging process.
- Regularly inspect the charging cable and adapter for any signs of damage, such as frayed wires or bent pins. If you notice any issues, replace them immediately with compatible replacements.
- If you have followed these charging instructions and tips but are still facing difficulties turning on your Gotrax Scooter, it is advisable to contact the manufacturer’s customer support for further assistance.
Remember, always prioritize safety and consult professional help if you are unsure about handling any electrical components related to your Gotrax Scooter.
Faulty Battery Connections
If your Gotrax scooter is not turning on, it may be due to faulty battery connections. Check the connections and ensure they are securely plugged in to solve this issue.
Why Does My Gotrax Scooter Not Turn On?
Does your Gotrax scooter refuse to turn on when you press the power button? One possible culprit for this issue is faulty battery connections. When the connections between the battery and the scooter are loose or dirty, it can prevent the scooter from powering up.
In this section, we will explore how to inspect and resolve battery connection problems to get your scooter up and running again.
Inspect Battery Connections:
To diagnose and fix the problem with your Gotrax scooter not turning on, follow these steps to inspect the battery connections:
- Start by ensuring the scooter is turned off and disconnected from any power source.
- Locate the battery compartment, typically found either under the footboard or in the stem of the scooter.
- Carefully remove the battery cover or access panel to expose the battery and its connections.
- Visually inspect the battery terminals and wires for any signs of corrosion, loose connections, or damage.
Cleaning And Tightening Connections:
Once you have identified any issues with the battery connections, it’s time to clean and tighten them to restore proper functionality:
- Begin by using a clean, dry cloth or brush to gently remove any dirt, dust, or debris from the battery terminals and wires.
- If there is corrosion on the terminals, you can mix a solution of baking soda and water to create a paste. Apply the paste to the affected areas using a cotton swab or cloth, and then gently scrub until the corrosion is removed.
- After cleaning, ensure that the battery terminals and wires are securely attached. If any connections are loose, use a wrench or screwdriver to tighten them snugly.
- Once you have cleaned and tightened all the battery connections, replace the battery cover or access panel.
By inspecting and maintaining the battery connections on your Gotrax scooter, you can address one potential cause of it not turning on. Remember to regularly check and clean the connections to prevent similar issues in the future. If the problem persists after ensuring proper battery connections, it may be necessary to seek further assistance from a qualified technician or Gotrax customer support.
Defective Battery
If your Gotrax scooter is not turning on, it could be due to a defective battery. Ensure the battery is properly connected and charged to resolve the issue.
Signs Of A Faulty Battery
If your Gotrax scooter is not turning on, one potential culprit could be a defective battery. Here are some signs that indicate your battery may be the issue:
- Lack of Power: Your scooter may not have the necessary power to turn on at all.
- Short Battery Life: The battery drains quickly and cannot hold a charge for long.
- Dimming Headlights: The headlights appear dim or flicker when the scooter is turned on.
- Difficulty Charging: The battery may have trouble charging fully or may not charge at all.
If you are experiencing any of these signs, it’s important to investigate the battery as a possible problem.
Loose Or Damaged Wires
Loose or damaged wires could be the reason why your Gotrax scooter is not turning on. Check for any loose connections or frayed wires that may need to be repaired or replaced to get your scooter up and running again.
Why Does My Gotrax Scooter Not Turn On:
If you’re experiencing issues with your Gotrax scooter not turning on, one possible cause could be loose or damaged wires. Electrical systems are crucial for the proper functioning of scooters, and any issues with the wiring can disrupt the power supply.
In this section, we will explore how to identify and resolve problems related to loose or damaged wires.
Inspect Wiring Connections:
To begin troubleshooting the issue, it is essential to carefully examine the various wiring connections on your Gotrax scooter. Here are some steps you can take:
- Visually inspect the wires and connectors, paying close attention to any visible signs of damage or wear.
- Ensure that all connections are secure and properly plugged in.
- Look out for loose or disconnected wires that may have come loose during regular use or transportation.
- Check the battery connections and make sure they are firmly attached.
Repairing Or Replacing Damaged Wires:
In some cases, wires may become frayed, cut, or otherwise damaged over time. If you identify any such issues, it is crucial to address them promptly. Here are some steps you can take to repair or replace damaged wires:
- Start by disconnecting the battery, ensuring your safety during the repair process.
- Identify the damaged wires and determine the extent of the damage.
- If the damage is minimal, you can attempt to repair the wires by carefully stripping the damaged section and reconnecting them securely.
- For more severe damage, it may be necessary to replace the entire wire. Make sure to use the appropriate gauge wire for your Gotrax scooter and follow any manufacturer guidelines.
Remember, if you’re uncomfortable or unsure about handling electrical repairs, it’s best to seek professional assistance. Safety should always be a top priority when working with electrical systems.
By inspecting the wiring connections and addressing any loose or damaged wires, you can potentially resolve the issue of your Gotrax scooter not turning on. However, if the problem persists after these troubleshooting steps, it is recommended to contact Gotrax customer support for further assistance.
Keep in mind that electrical issues can sometimes be complex, and it’s always better to err on the side of caution.
Faulty Power Switch
If your Gotrax scooter is not turning on, the issue could be a faulty power switch. Check the power switch for any damage or loose connections that may be preventing it from functioning properly.
Is your Gotrax scooter not turning on? It can be frustrating when your scooter fails to start, leaving you unable to zip around town. One possible culprit could be a faulty power switch. In this section, we will explore how to test the power switch and discuss replacement options to get your scooter up and running again.
Testing The Power Switch:
To determine if the power switch is causing the issue, you can perform a simple test. Follow these steps:
- Ensure that the scooter is turned off and unplugged.
- Locate the power switch on your Gotrax scooter.
- Examine the switch for any visible damage or loose connections.
- Using a multimeter, set it to the continuity mode.
- Touch one probe to each of the switch’s terminals.
- If the multimeter shows a reading of zero or close to zero, it indicates that the switch is working properly.
- If there is no continuity or a high resistance reading, it suggests a faulty power switch.
Remember, safety is crucial during the testing process. Always follow proper safety precautions and refer to the manufacturer’s guidelines.
Replacement Options:
If your power switch is indeed faulty, don’t worry! There are replacement options available:
- Contact the Gotrax customer support team. They can provide you with options for purchasing a genuine replacement power switch.
- Check online marketplaces or scooter parts stores for compatible power switches.
- If you have technical skills, you can consider replacing the power switch yourself. Be sure to consult the Gotrax scooter manual or online tutorials for detailed instructions.
- If you are not confident in your abilities or prefer professional assistance, reach out to a certified repair technician. They have the expertise to replace the power switch correctly.
Remember to choose a replacement power switch that matches your Gotrax scooter model to ensure compatibility.
A faulty power switch can be the cause of your Gotrax scooter not turning on. By following the steps to test the switch and exploring replacement options, you can troubleshoot and resolve the issue effectively. Get back on the road and enjoy the thrill of riding your scooter once again!
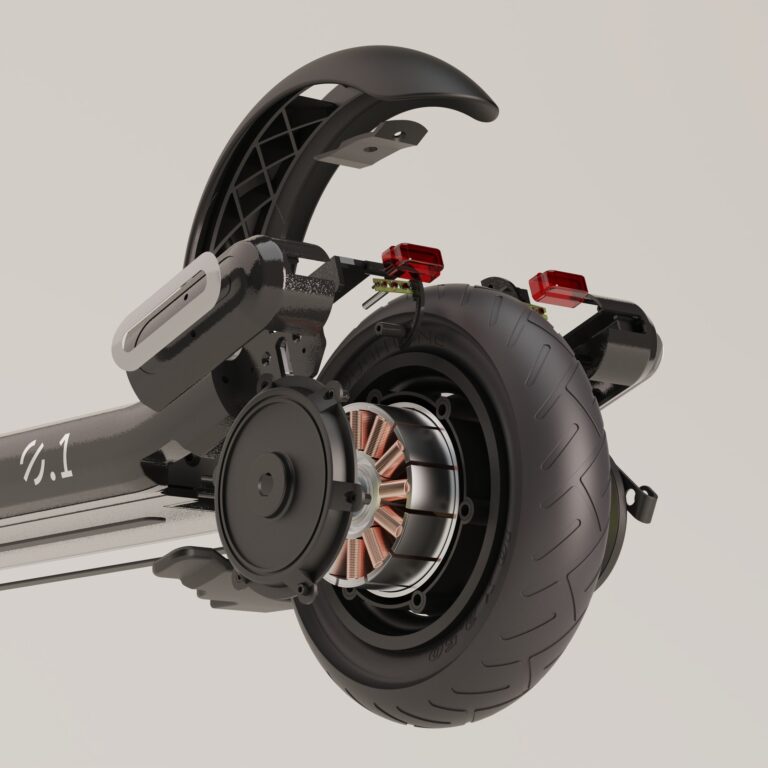
Controller Issues
Is your Gotrax scooter refusing to turn on? The issue may lie with the controller. Discover the possible reasons behind this problem and find solutions to get your scooter up and running again.
Why Does My Gotrax Scooter Not Turn On:
If your Gotrax scooter is not turning on, the issue could lie with the controller. The controller is responsible for regulating the power flow to your scooter’s motor, so any problems with it can result in your scooter not turning on.
To diagnose and fix controller issues, follow the steps outlined below:
Testing The Controller
To determine whether the controller is the cause of your scooter not turning on, you can perform a few simple tests:
- Check the connection: Ensure that all the cables connecting the controller to the battery and motor are securely plugged in. Loose connections can prevent the scooter from powering on. Give them a gentle tug to verify their tightness.
- Inspect for damage: Examine the controller for any visible signs of damage, such as frayed wires or burnt components. Damaged parts may require repair or replacement to restore functionality.
- Check for fault codes: Some scooters are equipped with fault code indicators. Refer to the user manual or the manufacturer’s website to determine the meaning of any displayed fault codes and troubleshoot accordingly.
- Test with a multimeter: If you have a multimeter, you can use it to measure the voltage output of the controller. Compare the reading to the specifications provided by the manufacturer to determine if the controller is functioning correctly.
Repair Or Replacement Considerations
Once you have identified a faulty controller as the reason behind your scooter not turning on, you can consider the following repair or replacement options:
- Repairs: If the issue with the controller is minor, you may be able to repair it yourself or take it to a trusted technician. Common repairs include fixing loose connections, replacing damaged wires, or soldering components. However, keep in mind that repairing the controller requires technical expertise, so it’s best to consult a professional if you lack experience.
- Replacement: In some cases, the controller may be beyond repair or the most cost-effective solution is to replace it altogether. Contact Gotrax or an authorized dealer to purchase a new controller that is compatible with your scooter’s model. Before purchasing, double-check the specifications to ensure compatibility.
Remember that if your scooter is still under warranty, repairs or replacements may be covered, so reach out to the manufacturer for assistance.
By performing these tests and considering repair or replacement options, you can address controller issues and get your Gotrax scooter up and running again.
Motor Overheating
Motor overheating can cause your Gotrax scooter to not turn on. This issue may be due to excessive usage or a malfunctioning cooling system, leading to the motor reaching critical temperatures.
Signs Of An Overheating Motor
If you’ve been experiencing difficulties with your Gotrax scooter turning on, it could be due to the motor overheating. Here are some signs to look out for:
- Excessive heat: If you feel the motor becoming unusually hot to the touch, it could indicate an overheating issue. This can be felt around the motor or the motor compartment.
- Burning smell: Another indication of an overheating motor is a strong burning smell. If you notice any abnormal odors coming from your scooter, it’s important to address the issue promptly.
- Reduced performance: An overheating motor can lead to a decline in your scooter’s performance. You may notice decreased speed, acceleration, or overall power.
Preventing Motor Overheating
To avoid motor overheating and keep your Gotrax scooter running smoothly, consider the following tips:
- Maintain proper tire pressure: Ensure that your scooter’s tires are adequately inflated. Low tire pressure can cause unnecessary strain on the motor, leading to overheating.
- Check for obstructions: Regularly inspect your scooter for any obstructions around the motor area. Clear away any debris, such as leaves or dirt, that could hinder proper air circulation and contribute to motor overheating.
- Avoid excessive loads: Be mindful of the weight limit specified for your Gotrax scooter. Carrying excessive loads can put excessive strain on the motor, increasing the likelihood of overheating.
- Limit steep inclines: Uphill climbs can put a significant strain on the motor. Limit the frequency and duration of steep inclines, as they can contribute to overheating.
- Avoid prolonged idling: Leaving your scooter idle for extended periods can lead to motor overheating. If you need to stop for a prolonged period, consider turning off the scooter to minimize the chances of overheating.
- Regular maintenance: Schedule regular maintenance for your Gotrax scooter. This includes checking the motor’s condition and ensuring it is clean and free from dirt or debris.
By following these preventive measures, you can minimize the risk of motor overheating and maximize the longevity and performance of your Gotrax scooter. Stay aware of the signs of overheating, and take prompt action if you notice any irregularities.
Motor Brush Problems
One potential reason for a Gotrax scooter not turning on could be motor brush problems. It’s crucial to check the motor brushes as they may wear out or become damaged over time, leading to power issues. Regular maintenance and replacement of motor brushes can help ensure smooth functioning of the scooter.
If you’re having trouble turning on your Gotrax scooter, one possible issue could be a problem with the motor brushes. Motor brushes are small carbon blocks that make contact with the spinning motor armature, allowing electricity to flow and power the scooter.
Over time, these brushes can wear out or become damaged, causing your scooter to fail to turn on. In this section, we will discuss the symptoms of worn-out motor brushes and how to replace them.
Symptoms Of Worn-Out Motor Brushes:
- Scooter fails to turn on even after charging: One of the main signs of worn-out motor brushes is when your scooter doesn’t respond or turn on, even if it has been fully charged. This could indicate that the brushes are no longer making proper contact with the motor armature.
- Intermittent loss of power: Another symptom of worn-out motor brushes is experiencing intermittent loss of power while riding your scooter. You might notice that the scooter suddenly slows down or stops working altogether for short periods of time before starting again.
- Motor noise or unusual sounds: If you hear unusual sounds coming from the motor while riding your scooter, this could be a sign that the motor brushes are worn and need to be replaced. These sounds may include grinding, scraping, or high-pitched squealing noises.
- Sparking or burning smell: Worn-out motor brushes can cause sparking between the brushes and the armature, leading to a burning smell. If you notice a distinct burning odor coming from the motor, it’s a clear indication that the brushes are in need of replacement.
Replacing Motor Brushes:
Replacing motor brushes is a relatively straightforward process that can be done at home with the right tools and some basic technical knowledge. Here is a step-by-step guide on how to replace the motor brushes on your Gotrax scooter:
- Gather the necessary tools: You will need a screwdriver, pliers, and replacement motor brushes compatible with your Gotrax scooter model.
- Disconnect the battery: Before starting any work on the motor, make sure to disconnect the battery to avoid any electrical mishaps.
- Locate the motor housing: The motor housing is usually located near the rear wheel of your Gotrax scooter. It may be covered by a protective casing or plastic panel that needs to be removed.
- Remove the old brushes: Once you have access to the motor, carefully remove the wire connections from the old brushes. Use your pliers to grip the brushes and gently pull them out.
- Install the new brushes: Take your replacement motor brushes and insert them into the brush holders, ensuring they are properly aligned with the armature. Push them in firmly but cautiously.
- Reconnect the wire connections: Next, reconnect the wire connections to the new brushes, making sure they are securely attached.
- Replace the motor housing: If you removed any protective casing or plastic panels, replace them now, ensuring they are properly secured.
- Reconnect the battery: Finally, reconnect the battery to the scooter.
By following these steps, you should be able to replace the worn-out motor brushes on your Gotrax scooter. If you’re unsure or uncomfortable performing this task yourself, it’s always recommended to consult a professional or contact Gotrax customer support for assistance.
Burnt-Out Motor
If your Gotrax scooter is not turning on, it could be due to a burnt-out motor. Check the motor for any signs of damage or overheating and consider getting it replaced to fix the issue.
Signs Of A Burnt-Out Motor:
- The scooter does not turn on or show any signs of power when the switch is turned on.
- You may notice burning smells or smoke emanating from the motor area.
- The scooter may have been exposed to water or moisture, which can cause damage to the motor.
- The motor may make unusual noises when attempting to turn on.
- A burnt-out motor can cause the scooter to jerk or have sluggish performance.
Motor Replacement Options:
- Contact the manufacturer or authorized dealer for a motor replacement.
- Consider hiring a professional technician to replace the motor if you are not familiar with scooter mechanics.
- Check if the motor is under warranty for a possible free replacement.
- If the scooter is older, you may want to consider purchasing a new scooter instead of investing in a motor replacement.
Remember, a burnt-out motor can be an expensive repair, so it’s important to weigh your options and consider the age and condition of your scooter.
Credit: electrek.co
Frequently Asked Questions For Why Does My Gotrax Scooter Not Turn On
Why Is My Electric Scooter Not Turning On?
Your electric scooter may not turn on due to a dead battery, faulty switch, loose connections, or a blown fuse.
How Do I Reset My Gotrax Electric Scooter?
To reset your GoTrax electric scooter, follow these steps: 1. Turn off the scooter and disconnect the charger. 2. Hold down the power button for 5 seconds to reset the scooter’s system. 3. Wait for the scooter to power off and then turn it back on.
4. Your GoTrax electric scooter is now reset and ready to use.
Why Isn T My Gotrax Scooter Moving?
Check if the scooter is turned on and the battery is charged. Make sure the brakes are not engaged.
Where Is The Reset Button On My Electric Scooter?
The reset button on your electric scooter can usually be found near the battery or control panel.
Conclusion
Troubleshooting your Gotrax scooter when it fails to turn on can be a frustrating experience. By following the steps outlined in this blog post, you can diagnose and resolve common issues that may be preventing your scooter from powering up.
Remember to check the battery connections and charge level, examine the power switch and throttle, and inspect the fuse and circuit breaker. Taking the time to investigate these components can save you time and money by avoiding unnecessary trips to the repair shop.
Furthermore, regular maintenance and proper care can significantly extend the lifespan of your scooter. By keeping it clean, storing it properly, and regularly checking for any signs of wear or damage, you can enjoy many more rides on your trusty Gotrax scooter.
So, go ahead and apply these troubleshooting tips to get your scooter back up and running in no time.