Dio Scooter Not Starting: Troubleshooting Tips to Get You Back on the Road
Dio scooter not starting? Check spark plug and fuel supply for potential issues.
If your Dio scooter is not starting, it could be due to problems with the spark plug or fuel supply. Ensure the spark plug is clean and in good condition, and check the fuel tank for sufficient fuel and proper delivery to the engine.
By addressing these potential issues, you may be able to get your Dio scooter up and running again smoothly.
Diagnosing Common Issues With Your Dio Scooter
Having trouble starting your Dio scooter? Learn how to diagnose common issues and get your scooter back on the road in no time. From checking the fuel and spark plug to inspecting the battery and ignition switch, we’ve got you covered.
If you’re having trouble starting your Dio scooter, there could be a few common issues that you can diagnose and potentially fix yourself. Before taking your scooter to a mechanic, it’s worth checking a few key areas to troubleshoot the problem.
In this section, we’ll cover three main areas to focus on: Checking the Battery, Inspecting the Fuel System, and Examining the Ignition System. By following these steps, you can identify the issue and get your Dio scooter up and running again.
Checking The Battery:
- Check if the battery is properly connected: Ensure that the battery terminals are securely fastened and free of any dirt or corrosion. Clean them if necessary.
- Measure the battery voltage: Use a multimeter to test the voltage of the battery. It should read around 12 volts for a fully charged battery.
- Check the battery charge: If the voltage is below 12 volts, you may need to recharge or replace the battery.
- Inspect the battery condition: Look for any signs of damage or leakage. If the battery appears swollen or cracked, it may need to be replaced.
Inspecting The Fuel System:
- Check the fuel level: Make sure that there is enough fuel in the tank to start the scooter. Low fuel can prevent proper combustion.
- Inspect the fuel lines: Look for any signs of leaks or blockages in the fuel lines. Replace or clear any damaged or clogged fuel lines.
- Clean the carburetor: Over time, the carburetor can become clogged with debris. Remove the carburetor and clean it thoroughly to ensure proper fuel flow.
- Replace the fuel filter: If the fuel filter is clogged, it can restrict fuel flow to the engine. Replace the fuel filter if necessary.
Examining The Ignition System:
- Check the spark plug: Remove the spark plug and inspect it for signs of wear or damage. Clean or replace the spark plug as needed.
- Test the ignition coil: Use a multimeter to check the resistance of the ignition coil. If the resistance is outside the recommended range, you may need to replace the ignition coil.
- Inspect the wiring: Look for any loose or damaged wires in the ignition system. Ensure all connections are secure and repair or replace any damaged wires.
By following these steps to diagnose common issues with your Dio scooter, you can identify the problem and work toward resolving it. Remember to take appropriate safety precautions and consult a professional if you’re unsure about any repair work. Keep your scooter well-maintained to minimize potential starting issues in the future.
Checking The Battery
Having trouble starting your Dio scooter? Check the battery first. A weak or dead battery could be the culprit behind your scooter not starting.
:
If you’re having trouble starting your Dio scooter, the first thing to check is the battery. A faulty battery can prevent your scooter from starting and require some troubleshooting to get it back up and running. Follow these steps to check the battery and determine if it needs cleaning, tightening, or replacement:
Testing The Battery Voltage:
To check the battery voltage and determine its condition, you can use a multimeter. Here’s how to do it:
- Set the multimeter to the DC voltage setting.
- Connect the positive probe (red) to the positive terminal of the battery.
- Connect the negative probe (black) to the negative terminal of the battery.
- Read the voltage displayed on the multimeter. A fully charged battery should have a voltage between 12.6 and 12.8 volts. If the voltage is significantly lower, it may indicate a weak or discharged battery.
Cleaning And Tightening The Battery Connections:
Sometimes, poor battery connections can prevent your scooter from starting. Here’s how to clean and tighten the battery connections:
- Start by removing the battery cover to access the battery.
- Inspect the battery terminals for any corrosion or dirt buildup. If you notice any, use a battery cleaner or a mixture of baking soda and water to clean the terminals.
- After cleaning the terminals, use a wire brush or sandpaper to remove any remaining corrosion.
- Ensure that the battery cables are securely connected to the terminals. If they are loose, use a wrench to tighten them.
Replacing A Faulty Battery:
If the battery voltage is low despite charging and cleaning, it may be time to replace the battery. Here’s how to do it:
- Start by removing the battery cover to access the battery.
- Disconnect the negative cable from the battery terminal, followed by the positive cable.
- Remove any straps or brackets holding the battery in place.
- Install the new battery by connecting the positive cable to the positive terminal, followed by the negative cable to the negative terminal.
- Secure the battery in place with any straps or brackets.
- Reinstall the battery cover.
Remember, if you’re uncertain about handling the battery or any other issue with your Dio scooter, it’s best to consult a professional mechanic or refer to the manufacturer’s guidelines.
Inspecting The Fuel System
Inspecting the fuel system is crucial to diagnose why your Dio scooter is not starting. Check for any fuel leaks, clogged filters, or a faulty fuel pump that might be preventing the engine from getting the necessary fuel to start.
Is your Dio scooter failing to start? One possible issue could be a problem with the fuel system. In this section, we will guide you through the steps to inspect and troubleshoot the fuel system of your scooter. By following these steps, you may be able to identify and resolve the issue, getting your scooter back on the road in no time.
Verifying Fuel In The Tank:
To start with the basics, it is crucial to ensure that there is an adequate amount of fuel in your scooter’s tank. Follow these steps to verify the fuel level:
- Check the fuel gauge on your scooter’s dashboard if available.
- If your scooter doesn’t have a fuel gauge, use a flashlight to look into the fuel tank and visually inspect the fuel level.
- If the tank appears to be low or empty, refill it with the appropriate type of gasoline.
- Remember to use the manufacturer-recommended fuel to avoid any potential complications.
Assessing The Fuel Filter:
A clogged fuel filter can prevent fuel from reaching the engine, causing starting issues. Here’s how you can assess the condition of the fuel filter:
- Locate the fuel filter, typically found between the fuel tank and carburetor.
- Disconnect the fuel lines connected to the filter carefully.
- Inspect the filter for any signs of clogging or dirt accumulation.
- If the filter appears dirty or obstructed, it may need to be cleaned or replaced.
- Cleaning the filter involves rinsing it with a suitable cleaning agent and allowing it to dry thoroughly before reinstalling.
- If the filter is heavily clogged or damaged, it is advisable to replace it with a new one.
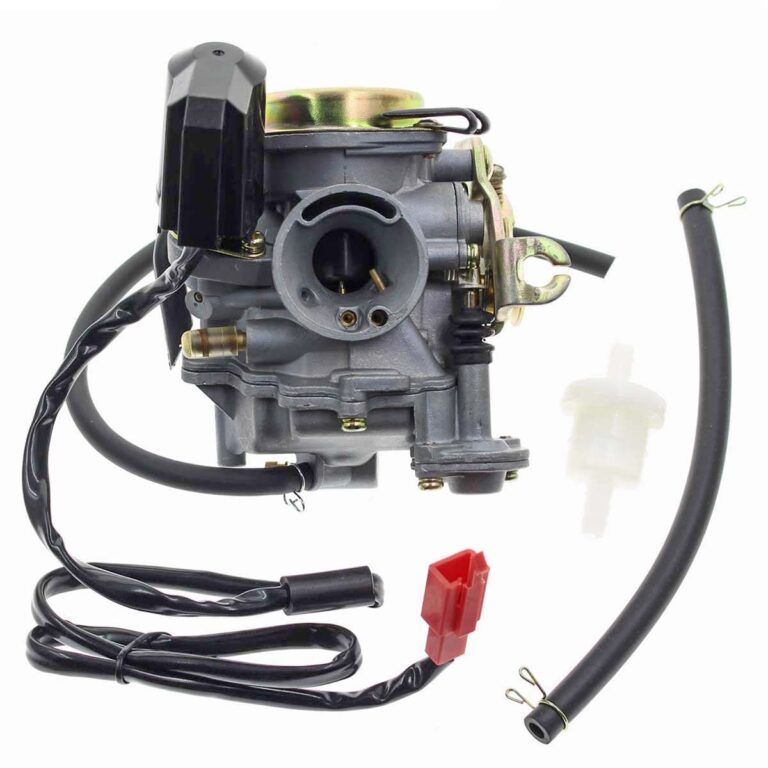
Clearing Fuel Lines And Carburetor:
Obstructions in the fuel lines or carburetor can disrupt the flow of fuel, leading to starting problems. Follow these steps to clear the fuel lines and carburetor:
- Begin by disconnecting the fuel lines from both the fuel tank and the carburetor.
- Using compressed air or a carburetor cleaner, blow out any debris or blockages from the fuel lines.
- Next, remove the carburetor from the scooter following the manufacturer’s instructions.
- Inspect the carburetor for any clogged jets or passages.
- Clean the carburetor thoroughly using a carburetor cleaner.
- Reinstall the carburetor and reconnect the fuel lines securely.
- Ensure all connections are tight and free from any leaks.
By following these steps to inspect and troubleshoot your Dio scooter’s fuel system, you can increase the chances of identifying and resolving the issue. If the problem persists after these steps, it may be advisable to consult a professional mechanic or authorized service center for further assistance.
Examining The Ignition System
To troubleshoot a Dio scooter not starting, it’s essential to examine the ignition system. By checking the spark plug, ignition coil, and wiring connections, you can pinpoint the issue and get your scooter up and running smoothly again.
Dio Scooter Not Starting
Is your Dio scooter refusing to start? Don’t panic. There could be a simple issue with the ignition system that’s preventing your scooter from firing up. In this section, we will dive into the different components of the ignition system and how to inspect them to get your Dio scooter back on the road.
Inspecting Spark Plug And Wire
A faulty spark plug or spark plug wire is a common culprit behind a scooter’s ignition problems. Follow these steps to inspect the spark plug and wire:
- Start by locating the spark plug, which is typically on top of the engine.
- Take out the spark plug using a socket wrench and examine it for any signs of damage, such as worn electrodes or a fouled appearance.
- If the spark plug looks worn out or damaged, it’s time for a replacement.
- Next, check the spark plug wire for any visible wear and tear, such as cracks or exposed wiring.
- Ensure that the wire is securely connected to both the spark plug and the ignition coil.
Assessing The Ignition Switch
The ignition switch controls the flow of electrical current to the scooter’s ignition system. Follow these steps to assess the ignition switch:
- Locate the ignition switch, usually found near the handlebars or under the seat.
- Turn the ignition switch to the “on” position and listen for any clicking or buzzing sounds.
- If you don’t hear any noise, it’s possible that the ignition switch is faulty and needs to be replaced.
- Inspect the wiring connected to the ignition switch for any loose or damaged connections.
- Check the ignition switch for any signs of physical damage, such as cracks or excessive wear.
Checking The Kill Switch
The kill switch, also known as the engine kill or emergency stop switch, is a safety feature that shuts off the engine when engaged. Follow these steps to check the kill switch:
- Locate the kill switch, often positioned near the handlebars or on the scooter’s control panel.
- Ensure the kill switch is in the “run” or “on” position.
- Verify that the kill switch is not stuck or jammed in the “off” position.
- Look for any signs of damage to the kill switch, such as a broken or loose switch.
- Make sure the wiring connected to the kill switch is intact and securely attached.
By meticulously inspecting the spark plug and wire, assessing the ignition switch, and checking the kill switch, you can identify potential issues with the ignition system of your Dio scooter. Following these troubleshooting steps will help you diagnose and resolve the starting problem, getting you back on the road in no time.
Getting Help From A Professional
Having trouble starting your Dio scooter? Get professional help for a reliable solution and expert advice. Don’t let the frustration hold you back from enjoying your ride.
Knowing When To Seek Professional Assistance
If you’ve tried troubleshooting your Dio scooter but still can’t get it started, it may be time to seek professional help. Here are some signs that indicate when it’s appropriate to consult a mechanic:
- Persistent Starting Issues: If your Dio scooter consistently fails to start, even after multiple attempts, it’s a clear sign that there may be a more complex issue that requires professional attention.
- Unusual Noises or Odors: Strange noises or unusual smells coming from your scooter when you try to start it can be indicators of underlying mechanical problems. A professional mechanic will be able to diagnose and address these issues promptly.
- Electrical Malfunctions: If you suspect an electrical problem, such as faulty wiring or a dead battery, a professional mechanic with expertise in scooter electrical systems will be able to troubleshoot and fix any issues.
- Lack of Technical Expertise: If you’re not familiar with scooters or have limited mechanical knowledge, trying to fix the problem on your own could do more harm than good. Seeking assistance from a professional will ensure that the issue is addressed correctly.
Finding A Reliable Mechanic
When seeking professional assistance for your Dio scooter, it’s essential to find a reliable and skilled mechanic. Here’s what you should consider:
- Recommendations and Reviews: Start by asking friends, family, or fellow scooter owners for recommendations on trustworthy mechanics. Additionally, read online reviews and check out local scooter communities for insights on reputable mechanics in your area.
- Certifications and Experience: Look for mechanics who have certifications or experience specific to scooters. This ensures that they have the knowledge and expertise needed to diagnose and repair Dio scooter issues accurately.
- Warranty Compatibility: If your Dio scooter is still under warranty, consider choosing a mechanic who is authorized by the manufacturer or recognized by the warranty provider. This ensures that your warranty remains valid, and any repairs are conducted according to the manufacturer’s standards.
- Price and Transparency: While cost shouldn’t be the sole determining factor, it’s essential to find a mechanic who offers fair pricing for their services. Look for someone who is transparent about their pricing structure and provides estimates before starting any work.
Understanding Warranty And Maintenance Plans
Before seeking professional help for your Dio scooter, it’s crucial to understand your warranty and maintenance plans. Here’s what you need to know:
- Warranty Coverage: Familiarize yourself with the details of your scooter’s warranty, including the duration, coverage limitations, and any requirements for using authorized mechanics. Understanding your warranty will help you navigate the repair process and ensure that any repairs are covered.
- Maintenance Requirements: Review the maintenance guidelines provided by the manufacturer. Regular maintenance, such as oil changes and tune-ups, not only keeps your scooter running smoothly but also helps preserve your warranty. Following these guidelines can prolong the life of your scooter and prevent potential starting issues.
- Scheduled Maintenance Services: Some Dio scooters come with scheduled maintenance plans or packages offered by the manufacturer or dealerships. These plans often cover routine services at specific intervals, which can be convenient for scooter owners. Familiarize yourself with the available packages to make the most of the services provided.
By knowing when to seek professional assistance, finding a reliable mechanic, and understanding your warranty and maintenance plans, you can effectively address starting issues with your Dio scooter. Remember, reaching out to a knowledgeable professional ensures that your scooter gets the care and attention it needs to get back on the road.
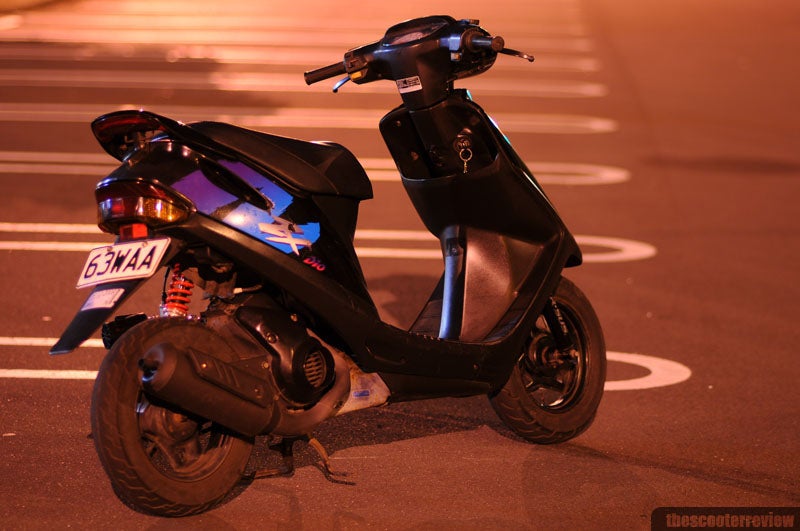
Credit: www.thescooterreview.com
Frequently Asked Questions On Dio Scooter Not Starting
Why Is Dio Scooty Not Starting?
Dio Scooty may not start due to possible issues with the fuel, battery, spark plug, or ignition switch.
Why Is My Dio Scooter Not Starting?
If your Dio scooter is not starting, it could be due to a variety of reasons. The most common issues include a dead battery, fuel supply problems, spark plug issues, or a faulty ignition switch. It’s best to consult a professional mechanic to diagnose and fix the problem accurately.
How Can I Check If My Dio Scooter Battery Is Dead?
To check if your Dio scooter’s battery is dead, try turning on the headlights. If they are dim or not working at all, it could indicate a dead battery. You can also use a voltmeter to measure the battery’s voltage.
If it reads below 12 volts, it’s likely that the battery needs to be replaced.
What Should I Do If My Dio Scooter Is Not Getting Fuel?
If your Dio scooter is not getting fuel, first check if there is enough fuel in the tank. Next, inspect the fuel lines and filters for any blockages or clogging. If necessary, clean or replace them. If the issue persists, it’s recommended to visit a mechanic to troubleshoot further and avoid any potential damage.
Conclusion
Troubleshooting a Dio scooter that won’t start can be a frustrating experience. However, by following the steps outlined in this blog post, you can diagnose and potentially fix the issue on your own. Remember to check the fuel system, battery, spark plug, and air filter for any signs of damage or debris.
It is equally important to ensure that you have proper fuel and oil levels. Regular maintenance and inspections can prevent future startup problems. Additionally, consulting a professional mechanic may provide further assistance in addressing any underlying issues. By addressing these common causes of non-starting Dio scooters, you can be back on the road and enjoying your ride in no time.
Stay vigilant and take care of your scooter to ensure smooth and reliable starts every time.