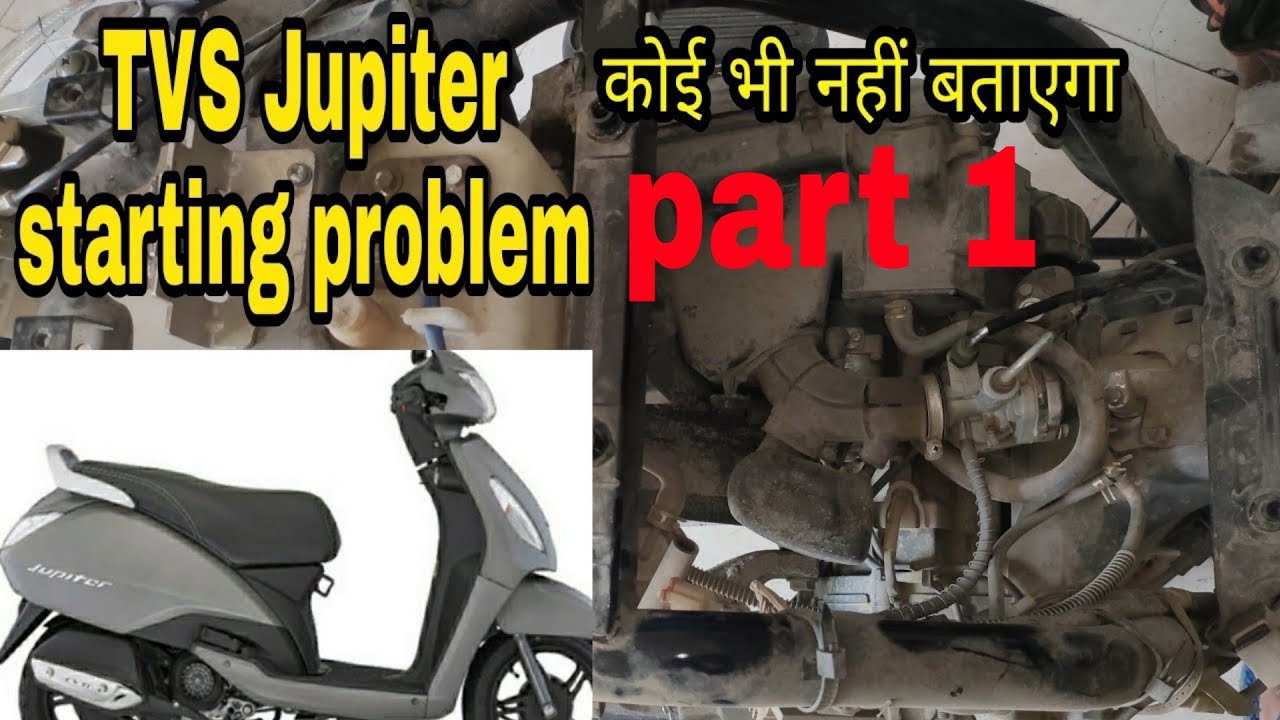
Jupiter Scooter Not Starting: Troubleshooting Guide
If your Jupiter scooter is not starting, it could be due to a dead battery or a faulty ignition switch. Jupiter scooters are known for their reliability and performance, but like any other vehicle, they can encounter issues from time to time.
We will explore possible reasons why your scooter is not starting and provide some troubleshooting steps to help you get back on the road. From checking the battery connections to inspecting the ignition system, we’ll cover the essential aspects to consider when diagnosing the problem.
So, let’s dive in and find out what might be causing your Jupiter scooter to not start.
Common Symptoms Of A Jupiter Scooter Not Starting
Experiencing difficulties starting your Jupiter scooter? Look out for common symptoms such as a dead battery, fuel issues, spark plug problems, or a faulty ignition switch. By addressing these issues, you can get your scooter up and running again in no time.
:
When you’re ready to take a ride on your trusty Jupiter scooter, the last thing you want is to encounter starting issues. Whether it’s the engine failing to turn over, a lack of ignition spark, or the electric scooter simply not powering on, these common symptoms can leave you feeling frustrated.
In this section, we’ll explore each of these issues in detail, helping you diagnose and resolve them effectively.
Engine Not Turning Over:
- Battery drain: If your Jupiter scooter’s battery is drained, it can cause the engine to not turn over. This could be due to leaving the scooter unused for an extended period or a faulty battery.
- Starter motor issues: A malfunctioning starter motor can prevent the engine from turning over. This may be caused by a loose connection or a faulty starter motor itself.
- Fuel system problems: Issues with the fuel system, such as a clogged fuel filter or a fuel pump failure, can prevent the engine from turning over. Ensure the fuel lines are clear and the fuel pump is functioning properly.
No Ignition Spark:
- Spark plug problems: A faulty or fouled spark plug can lead to no ignition spark. Check for signs of wear or carbon buildup on the spark plug and replace it if necessary.
- Ignition coil failure: If the ignition coil is faulty, it won’t be able to produce the necessary spark to ignite the fuel-air mixture. A thorough inspection of the ignition coil is required to determine if it needs replacing.
- Wiring issues: Loose or damaged wiring connections can disrupt the ignition spark. Carefully inspect the wiring harness and connections for any signs of damage or disconnection.
Electric Scooter Not Powering On:
- Battery issues: A depleted or faulty battery can cause your electric scooter to not power on. Check the battery voltage and connections to ensure they are secure and functional. Consider replacing the battery if necessary.
- Controller malfunction: The electronic controller, responsible for regulating power to the electric scooter, can malfunction, resulting in no power. Inspect the controller for any visible damage or signs of failure.
- Faulty power switch: A defective power switch can prevent the electric scooter from powering on. Test the switch for proper functionality and replace it if needed.
Remember, troubleshooting and resolving these issues may require some technical knowledge and tools. If you’re unsure or uncomfortable with DIY repairs, it’s always best to consult a professional. With a little detective work, you’ll be back on the road with your Jupiter scooter in no time!
Checking The Battery
If your Jupiter scooter is not starting, checking the battery should be your first step. Ensure the battery is fully charged and properly connected to troubleshoot the issue.
Jupiter Scooter Not Starting
Is your Jupiter scooter not starting? Don’t worry! We’re here to help you troubleshoot and get your scooter back on the road in no time. One common issue that may prevent your scooter from starting is a faulty battery. In this section, we’ll guide you through the process of checking the battery and taking necessary actions.
Inspecting Battery Connections:
To start troubleshooting, it’s important to inspect the battery connections. Loose or corroded connections can disrupt the flow of power and prevent the scooter from starting. Here’s what you need to do:
- Look for any visible signs of corrosion on the battery terminals.
- Ensure that the battery cables are securely connected to the terminals.
- Clean any corrosion using a battery terminal cleaner or a mixture of baking soda and water.
- Tighten the battery cable connections if they are loose.
Testing Battery Voltage:
If the battery connections seem fine, the next step is to test the battery voltage. This will help determine if the battery is providing sufficient power for the scooter to start. Follow these steps:
- Use a multimeter to measure the voltage of the battery.
- Make sure the scooter is turned off and the battery is disconnected.
- Set the multimeter to the DC voltage mode and connect the positive and negative probes to the corresponding battery terminals.
- Check the voltage reading. A fully charged scooter battery typically has a voltage of around 12.6 volts or higher.
- If the voltage is significantly lower, it might indicate a weak or discharged battery.
Replacing A Faulty Battery:
If the battery voltage is below the recommended level, it’s time to replace the battery. Here are the steps to replace a faulty battery:
- Purchase a compatible replacement battery for your Jupiter scooter.
- Make sure the scooter is turned off and the battery is disconnected.
- Remove any battery covers or protective layers, if applicable.
- Disconnect the battery cables from the terminals, starting with the negative (-) cable followed by the positive (+) cable.
- Carefully remove the old battery from its compartment.
- Place the new battery in the compartment and secure it properly.
- Connect the battery cables to the corresponding terminals, ensuring a tight connection.
- Double-check all the connections and make sure everything is secure.
By following these steps, you can effectively troubleshoot battery-related issues that might be preventing your Jupiter scooter from starting. Remember to prioritize safety and consult a professional if you’re unsure or need further assistance. Get ready to hit the road again with your fully functional scooter!
Troubleshooting The Ignition System
Having trouble starting your Jupiter scooter? It could be a problem with the ignition system. Troubleshooting this can help you get your scooter up and running again.
The ignition system is a crucial component of your Jupiter scooter, responsible for starting the engine. If you find that your scooter is not starting, troubleshooting the ignition system is essential to identify and resolve the issue. In this section, we will explore three key areas to check when troubleshooting the ignition system: inspecting spark plug condition, testing the ignition coil, and checking the CDI unit.
Inspecting Spark Plug Condition:
When troubleshooting the ignition system of your Jupiter scooter, one of the first areas to inspect is the spark plug. A faulty spark plug can hinder the ignition process, preventing your scooter from starting. Here are some key points to consider when examining the spark plug:
- Check for fouling or carbon buildup on the spark plug electrode: Fouling or carbon deposits can hinder the spark plug’s ability to generate a spark, resulting in poor combustion and difficulty starting the scooter.
- Ensure the spark plug gap is within the manufacturer’s recommended specifications: An incorrect spark plug gap can affect the spark’s intensity and timing, impacting the ignition process.
- Look for any signs of damage or wear: Cracked insulation, bent electrode, or worn-out electrodes can all affect the performance of the spark plug.
Testing The Ignition Coil:
The ignition coil plays a vital role in the ignition system, amplifying the electrical current to generate the high voltage needed for spark plug ignition. Here’s what to consider when testing the ignition coil:
- Check for continuity across the primary and secondary windings of the coil: A lack of continuity indicates a faulty coil that needs replacement.
- Inspect the coil for any signs of physical damage: Cracks, corrosion, or moisture can all impact the performance of the ignition coil.
- Test the coil’s output voltage using a multimeter: Ensure that the coil is generating the appropriate voltage for spark plug ignition.
Checking The Cdi Unit:
The CDI (Capacitor Discharge Ignition) unit is responsible for regulating the ignition timing and delivering the high voltage needed to produce a spark. When troubleshooting the ignition system, examining the CDI unit is crucial. Consider the following:
- Ensure proper electrical connections: Check that all wires and connectors are securely connected to the CDI unit.
- Inspect the CDI unit for physical damage: Cracks, water damage, or corrosion can all affect its functionality.
- Test the CDI unit using a compatible diagnostic tool: This will help identify any potential issues with the unit’s electronic components.
By carefully inspecting the spark plug condition, testing the ignition coil, and checking the CDI unit, you can effectively troubleshoot the ignition system of your Jupiter scooter. Remember to follow proper safety precautions and consult a professional if you are unsure about any aspect of troubleshooting or repairing your scooter’s ignition system.
Verifying Fuel Supply
To start a Jupiter Scooter that is not starting, it is crucial to verify the fuel supply. Check the fuel tank and ensure it is filled with clean and sufficient fuel for proper functioning.
If your Jupiter scooter is not starting, the issue might be related to the fuel supply. Follow these steps to ensure that fuel is reaching the engine properly:
Checking Fuel Level:
- Make sure the fuel tank has an adequate amount of fuel.
- Ensure that the fuel gauge is working properly by visually inspecting it.
Inspecting Fuel Lines For Blockages:
- Carefully examine the fuel lines for any signs of blockages or leakage.
- Check for any kinks or bends in the fuel lines that could obstruct the flow of fuel.
- Ensure that the fuel lines are securely connected to the scooter’s fuel tank and engine.
- Remove any debris or dirt from the fuel lines that may be hindering the fuel flow.
Testing The Fuel Pump:
- Check if the fuel pump is functioning correctly.
- Start by disconnecting the fuel line leading to the carburetor.
- Turn on the ignition switch to power up the fuel pump. Verify if fuel is being pumped out.
- If no fuel is being pumped, the fuel pump may need to be replaced or repaired.
- If fuel is pumping out, reconnect the fuel line and proceed to the next troubleshooting step.
Remember, verifying the fuel supply is crucial when your Jupiter scooter is not starting. By checking the fuel level, inspecting fuel lines for blockages, and testing the fuel pump, you can eliminate potential fuel-related issues and move on to other possible causes for the starting problem.
Cleaning The Carburetor
To get your Jupiter scooter up and running again, try cleaning the carburetor. This simple maintenance task can help resolve starting issues and improve overall performance.
If you’re facing issues with your Jupiter scooter not starting, one of the potential culprits could be a dirty carburetor. Over time, the build-up of dirt, debris, and old fuel can clog the carburetor jets and passages, hindering the scooter’s performance.
Follow these steps to clean the carburetor and get your scooter up and running smoothly again:
Removing The Carburetor
To clean the carburetor, you’ll first need to remove it from the Jupiter scooter. Here’s how to do it:
- Begin by locating the carburetor, typically situated on the side or bottom of the scooter’s engine.
- Carefully disconnect the fuel line and any other connections linked to the carburetor.
- Loosen the bolts or screws holding the carburetor in place.
- Gently pull the carburetor away from the engine, ensuring not to damage any surrounding components.
Cleaning The Carburetor Jets And Passages
Once you’ve removed the carburetor, focus on cleaning its jets and passages, which play a crucial role in fuel delivery. Follow these steps:
- Wear protective gloves and eyewear to avoid contact with any cleaning agents.
- Use a carburetor cleaner spray to thoroughly clean the exterior of the carburetor, removing any surface grime or deposits.
- Locate the jets and passages on the carburetor. These smaller openings are responsible for regulating fuel flow.
- Carefully spray carburetor cleaner into each jet and passage, ensuring the solution reaches the interior of the carburetor to dislodge any blockages.
- Use a soft brush or a carburetor cleaning kit to gently scrub away any stubborn residue.
Reinstalling The Carburetor
Now that you’ve cleaned the carburetor, it’s time to reinstall it back into your Jupiter scooter. Follow these steps:
- Align the carburetor with the engine intake manifold carefully.
- Secure the carburetor in place by tightening the bolts or screws.
- Reconnect the fuel line and any other connections you detached earlier, ensuring they are firmly attached and have no leaks.
- Double-check all connections to ensure everything is properly reinstalled.
Can greatly improve the starting issues you’re experiencing with your Jupiter scooter. By removing any blockages in the jets and passages, you’ll restore proper fuel flow, leading to optimal scooter performance. Remember to perform regular maintenance to prevent future carburetor issues and keep your scooter in top shape.
Checking The Fuel Filter
To troubleshoot a Jupiter scooter that won’t start, it’s important to check the fuel filter. Clean or replace the filter to ensure proper fuel flow and get your scooter running smoothly again.
Locating The Fuel Filter
To troubleshoot why your Jupiter scooter is not starting, one of the first things you should check is the fuel filter. The fuel filter helps ensure that the fuel flowing into your scooter’s engine is clean and free from debris.
Here’s how you can locate the fuel filter:
- The fuel filter is typically located near the fuel tank or along the fuel line in most Jupiter scooter models.
- Refer to your scooter’s user manual or do a quick online search for the specific location of the fuel filter in your scooter model.
- Once you’ve identified its location, you can move on to inspecting the filter for clogs or debris.
Inspecting The Filter For Clogs Or Debris
Over time, the fuel filter can become clogged with dirt, debris, or even old fuel residue. This can restrict the flow of fuel and prevent the scooter from starting. Here’s how you can inspect the filter for clogs or debris:
- Carefully remove the fuel filter from its housing using the appropriate tools.
- Examine the filter for any visible signs of clogs or debris.
- If the filter appears dirty or clogged, you may need to clean or replace it.
- Cleaning the filter involves using compressed air or a solvent specifically designed for cleaning fuel filters.
- If the filter is damaged or if cleaning doesn’t improve its condition, it’s time to replace the fuel filter.
Replacing A Dirty Or Damaged Fuel Filter
A dirty or damaged fuel filter can significantly affect the performance and starting ability of your Jupiter scooter. Here’s how you can replace a dirty or damaged fuel filter:
- Ensure you have the correct replacement fuel filter for your scooter model. You can consult the user manual or seek advice from a reputable scooter parts store.
- Using the appropriate tools, remove the old fuel filter from its housing.
- Install the new fuel filter in the correct orientation, following any instructions provided with the replacement part.
- Secure the fuel filter in place and ensure it is tightly and securely attached.
- Once the new fuel filter is installed, you can attempt to start your scooter again to see if the issue has been resolved.
Remember, if you are unsure about any aspect of locating, inspecting, or replacing the fuel filter on your Jupiter scooter, it’s always a good idea to consult a professional or seek guidance from a certified scooter technician. They will have the expertise and experience to properly diagnose and resolve any starting issues with your scooter.
Assessing The Engine Compression
To determine why your Jupiter scooter is not starting, it is crucial to assess the engine compression. By examining this, you can identify any possible issues with the internal combustion process and take necessary steps to resolve them.
Performing a compression test:
- A compression test is a simple and effective way to assess the health of your Jupiter scooter’s engine. It helps in diagnosing engine-related issues that may be preventing your scooter from starting. By testing the engine compression, you can determine whether there are any problems with the piston rings, valves, or cylinder head gasket that may be causing low compression.
Identifying low compression issues:
- Low compression is often the culprit when a Jupiter scooter fails to start. Here are some signs and symptoms that may indicate low compression:
- Difficulty starting the scooter or engine cranking slowly.
- Lack of power and a decrease in overall performance.
- Backfiring, especially during acceleration.
- Decreased fuel efficiency.
- Smoke coming from the exhaust pipe.
- It is important to note that low compression can be caused by various factors, including worn or damaged piston rings, valve problems, cylinder head gasket leaks, or even a faulty spark plug. Identifying the specific cause of low compression is crucial for effective troubleshooting.
Addressing engine compression problems:
- Once you have determined that the engine compression is low, it’s time to address the underlying issues. Here are some steps you can take to deal with engine compression problems:
- Inspect and clean the spark plugs: Faulty or dirty spark plugs can contribute to low compression. Remove the spark plugs and check for signs of damage or fouling. Clean or replace them if necessary.
- Check the cylinder head gasket: A faulty cylinder head gasket can lead to compression leaks. Inspect the gasket for any signs of damage or leakage. If needed, replace the gasket to ensure proper sealing.
- Test the valves: Valves that are not seating correctly can result in low compression. Use a compression tester to check the valve seal. If necessary, adjust or replace the valves to restore compression.
- Evaluate the piston rings: Worn or damaged piston rings can significantly impact engine compression. Remove the cylinder head and inspect the rings for signs of wear or damage. Replace any faulty rings to restore optimal compression.
- It’s important to follow the manufacturer’s instructions and seek professional assistance if needed when addressing engine compression problems. Proper diagnosis and repair will help get your Jupiter scooter up and running smoothly again.
Credit: www.nytimes.com
Examining The Air Filter
Examining the air filter is crucial when troubleshooting a Jupiter scooter that won’t start. Checking for dirt or clogs will help ensure proper airflow and potentially resolve the issue.
If you’re experiencing trouble starting your Jupiter scooter, one possible cause could be a dirty or blocked air filter. The air filter plays a crucial role in your scooter’s performance by ensuring that clean air enters the engine. Over time, it can become clogged with dirt and debris, affecting the air-to-fuel ratio and causing starting issues.
In this section, we’ll explore how to access the air filter, inspect it for dirt or blockages, and clean or replace it if necessary.
Accessing The Air Filter:
To examine the air filter of your Jupiter scooter, follow these steps:
- Locate the air filter compartment: Typically, the air filter is housed in a rectangular or cylindrical compartment near the engine or beneath the seat.
- Remove the cover: Depending on the model, you may need to unscrew or unfasten clips holding the cover in place.
- Carefully lift off the cover: Take caution not to damage any components inside the compartment while doing so.
- Take note of the air filter’s position: Observe how the air filter is positioned before proceeding with the inspection.
Inspecting For Dirt Or Blockages:
Once you have accessed the air filter, thoroughly examine it for any dirt, dust, or blockages. Here’s what you should look out for:
- Dirt and debris: Check for a layer of dirt or debris covering the surface of the air filter.
- Clogs or blockages: Inspect the filter for any obstructions that may be hindering the airflow, such as leaves or insects.
- Damage or wear: Note any tears, holes, or signs of deterioration that may compromise the filter’s effectiveness.
Cleaning Or Replacing The Air Filter:
Depending on the condition of the air filter, you may either need to clean or replace it. Here’s how to proceed:
Cleaning the air filter:
- Gently tap off loose dirt: If the air filter appears dirty but is not extensively clogged, you can try tapping it against a solid surface to dislodge loose dirt.
- Use compressed air: If tapping doesn’t solve the issue, you can use compressed air to blow away stubborn dirt and debris. Hold the air canister at a safe distance to avoid damaging the filter.
- Check the filter’s cleanliness: Once you’ve cleaned it, ensure that the air filter is free from visible dirt or blockages before reinstalling it.
Replacing the air filter:
- Purchase a new air filter: If the filter is heavily clogged, damaged, or shows signs of wear, it’s advisable to replace it altogether. Consult your scooter’s user manual or contact a local Jupiter scooter dealer for the correct air filter model.
- Remove the old air filter: Detach the old filter from its housing and dispose of it properly.
- Install the new air filter: Carefully position the new filter into the compartment, ensuring it fits securely.
- Replace the cover: Put the cover back on, fasten any clips or screws, and ensure it is properly sealed.
By examining the air filter and either cleaning or replacing it, you can address a common issue that may be preventing your Jupiter scooter from starting. Regular maintenance of the air filter contributes to better engine performance and increased longevity.
Remember, it’s always recommended to consult your scooter’s manual or seek professional assistance if you’re unsure about any steps in the process.
Troubleshooting The Starter Motor
If your Jupiter scooter is not starting, troubleshooting the starter motor can help identify the issue. Understanding the common problems and possible solutions can get your scooter back on the road in no time.
Is your Jupiter scooter refusing to start? The issue could lie with the starter motor. Fear not, as troubleshooting the starter motor is a straightforward process that can help identify and resolve the problem. By following these steps, you can pinpoint the issue and get your scooter up and running again.
Testing The Starter Motor Solenoid:
- It is important to ensure that the power is reaching the starter motor. Test the starter motor solenoid using these steps:
- Begin by disconnecting the scooter’s battery to avoid accidental starts.
- Locate the solenoid near the starter motor. It should have two terminals.
- Use a multimeter set to the DC voltage setting to test the solenoid. Place the multimeter probes on the two solenoid terminals.
- Have a friend turn the scooter’s ignition key to the “start” position while you observe the multimeter reading.
- If the multimeter shows a reading close to the battery voltage, it signifies that the solenoid is receiving power. However, if there is no reading or a significantly lower voltage, the solenoid may be faulty and in need of replacement.
Checking The Starter Motor Brushes:
- Faulty starter motor brushes can prevent the motor from operating efficiently. Check the starter motor brushes using these steps:
- Locate the starter motor on your Jupiter scooter. It should be near the rear wheel.
- Carefully inspect the brushes for signs of wear or damage. If there are any visible problems, such as frayed or worn-out bristles, the brushes may need replacement.
- Clean the brushes gently with a brush or compressed air to remove any dirt or debris that may be interfering with their proper functioning.
- Ensure that the brushes are making good contact with the armature. They should move freely without any restrictions or excessive friction.
Replacing A Faulty Starter Motor:
- If troubleshooting and checking the solenoid and brushes don’t resolve the issue, it may be necessary to replace the starter motor. Follow these steps to replace a faulty starter motor:
- Begin by disconnecting the scooter’s battery.
- Locate the starter motor and remove the bolts securing it to the scooter’s frame.
- Disconnect the wiring harness and any other connections attached to the starter motor.
- Install the replacement starter motor, ensuring the bolts are securely fastened.
- Reconnect the wiring harness and other connections.
- Finally, reconnect the scooter’s battery and test the functionality of the new starter motor.
Remember, troubleshooting the starter motor is a critical step in resolving starting issues with your Jupiter scooter. By testing the starter motor solenoid, checking the starter motor brushes, or replacing a faulty starter motor, you can diagnose and fix the problem efficiently.
Get back on the road in no time and enjoy the smooth ride your scooter offers.
Inspecting The Wiring Connections
To troubleshoot a Jupiter Scooter not starting, inspect the wiring connections for any loose or damaged wires. Check for any loose connections or frayed wires that may be causing the issue.
If you’re facing the frustrating issue of your Jupiter scooter not starting, the problem might lie in its wiring connections. Inspecting these connections is crucial to identify any loose or disconnected wires, test electrical continuity, and repair or replace damaged wiring.
Follow the steps below to ensure your scooter’s wiring is in top condition:
Checking For Loose Or Disconnected Wires:
- Start by visually examining all the wiring connections in your Jupiter scooter.
- Ensure that plugs and connectors are firmly and securely attached.
- Gently tug on each wire to check for any signs of looseness or detachment.
- Look for any corroded or damaged wires that may impede electrical flow.
- Pay close attention to ignition-related wiring connections, as these are often a common culprit for starting issues.
Testing Electrical Continuity:
- Use a digital multimeter to test each wire for electrical continuity.
- Set the multimeter to the appropriate resistance or continuity mode.
- Connect the multimeter’s leads to each end of the wire being tested.
- Check the multimeter display for a reading indicating continuity.
- Repeat this process for all the wires in your scooter’s wiring system.
- If any wire doesn’t show continuity, it may be faulty and require repair or replacement.
Repairing Or Replacing Damaged Wiring:
- If you find any loose, disconnected, corroded, or damaged wires during inspection, address them promptly.
- Gently reconnect any loose or disconnected wires to their appropriate plugs or connectors.
- Clean off any corrosion on the affected wires using a wire brush or electrical contact cleaner.
- If a wire is severely damaged or corroded beyond repair, it’s necessary to replace that particular section of wiring.
- Make sure to use the correct gauge and type of wire when replacing damaged sections.
- Once all repairs and replacements are complete, retest the electrical continuity to ensure proper functioning.
By careful inspection, testing, and potential repairs, you can troubleshoot issues related to the wiring connections of your Jupiter scooter. Remember to prioritize safety precautions while handling electrical components, such as disconnecting the battery and wearing appropriate protective gear. Following these steps can help you get your scooter up and running again, ensuring a smooth and enjoyable ride.
Verifying The Kill Switch And Kickstand Switch
To troubleshoot a Jupiter scooter that won’t start, make sure to check the kill switch and kickstand switch. These switches can sometimes get accidentally engaged, preventing the scooter from starting. Ensure they are in the correct position before attempting to start the scooter again.
If you’re having trouble starting your Jupiter Scooter, it’s crucial to explore possible causes and solutions. Two important components to check are the kill switch and kickstand switch. In this section, we’ll go through the steps to test the functionality of the kill switch and verify the position of the kickstand switch.
If any issues are found, we’ll also discuss how to adjust or replace these faulty switches.
Testing The Kill Switch Functionality:
To ensure that the kill switch is not causing the starting issue, follow these steps:
- Locate the kill switch: Typically, it is located on the handlebars, next to the throttle or ignition switch.
- Check the position of the kill switch: Make sure it is set to the “ON” position.
- Inspect for any visible damage: Look for any signs of wear, corrosion, or loose connections.
- Toggle the kill switch: Flip the switch to the “OFF” position and then back to “ON” a few times. Listen for any clicking sounds or feel for resistance.
If the kill switch doesn’t seem to be functioning properly after these steps, it may be worth further examination or replacement.
Checking The Kickstand Switch Position:
If the kickstand switch is not in the correct position, it can prevent the scooter from starting. Here’s what you need to do:
- Locate the kickstand switch: It is usually found near the kickstand itself.
- Inspect the kickstand switch position: Ensure that the kickstand is fully retracted and that the switch is being engaged properly when the kickstand is up.
- Look for visible damage or misalignment: Check for any signs of wear, damage, or misalignment that may be affecting the switch’s functionality.
Adjusting or replacing faulty switches:
If you have determined that either the kill switch or kickstand switch is faulty, here are some steps to consider:
- Adjustment: If the switches are out of position or misaligned, you may be able to adjust them back into place. Consult your scooter’s user manual for specific instructions.
- Cleaning and maintenance: Sometimes, dirt or debris can affect the switches. Clean any visible dirt or grime and ensure that the connections are secure.
- Replacement: If the switches are damaged beyond repair or adjustment, it may be necessary to replace them. Contact an authorized Jupiter Scooter dealer or a professional technician for assistance.
By verifying the functionality of the kill switch and checking the position of the kickstand switch, you can troubleshoot and potentially resolve the issue with your Jupiter Scooter not starting. Remember to consult your user manual or seek professional help if needed.
Checking The Main Fuse And Circuit Breakers
To troubleshoot a non-starting Jupiter scooter, one should first check the main fuse and circuit breakers for any issues. This simple step can help identify and fix electrical problems that may be preventing the scooter from starting.
Locating The Main Fuse And Circuit Breakers:
- Start by locating the main fuse and circuit breakers on your Jupiter scooter. These components are typically located near the battery or the handlebars.
- Check the owner’s manual or consult an online guide specific to your Jupiter scooter model for detailed instructions on finding the main fuse and circuit breakers.
Testing For Continuity And Proper Functioning:
- Once you have located the main fuse and circuit breakers, it’s essential to test them for continuity and proper functioning.
- To test the fuse, use a multimeter set to the continuity or resistance mode. Place the multimeter probes on both ends of the fuse. If the fuse is blown, there will be no continuity, indicating that it needs to be replaced.
- To test the circuit breakers, visually inspect them for any signs of damage or being tripped. If a circuit breaker appears broken or is in the “off” position, you can try resetting it by flipping it to the “on” position.
Replacing A Blown Fuse Or Resetting A Circuit Breaker:
- If you have determined that the main fuse is blown, it will need to be replaced. Consult the owner’s manual or refer to an online guide specific to your Jupiter scooter model for the appropriate fuse type and replacement procedure.
- To replace a fuse, carefully remove the blown fuse and insert the new one in its place. Ensure that the new fuse is of the correct rating to prevent any electrical issues.
- If a circuit breaker is tripped or appears broken, try resetting it by moving it to the “on” position. If it trips again or does not stay in the “on” position, it may indicate an underlying issue that needs further inspection or professional assistance.
When troubleshooting your Jupiter scooter’s starting issue, checking the main fuse and circuit breakers is a crucial step. That way, you can identify and resolve any electrical issues that may be preventing your scooter from starting up. By following these steps, you can locate the main fuse and circuit breakers, test them for continuity and proper functioning, and replace a blown fuse or reset a circuit breaker if necessary.
Remember to consult your Jupiter scooter’s owner’s manual or seek professional help if you encounter any difficulties or uncertainties during the process.
Frequently Asked Questions For Jupiter Scooter Not Starting
Why Is My Jupiter Scooty Not Starting?
Possible answer: There are several reasons your Jupiter Scooty might not start, such as a dead battery, fuel issues, or spark plug problems.
How Do You Start A Jupiter Bike?
To start a Jupiter bike, follow these steps: 1. Turn on the ignition switch located near the handlebars. 2. Use the kick-start lever by pushing it down firmly with your foot. 3. Pull in the clutch lever located on the left side of the handlebars.
4. Shift the gear lever with your left foot to the desired gear (usually first gear). 5. Slowly release the clutch lever while giving some throttle with the right handgrip.
Does Jupiter Have Choke?
No, Jupiter does not have a choke.
What Is Eco Mode And Power Mode In Jupiter?
Eco mode in Jupiter conserves fuel by adjusting the scooter’s performance, while power mode enhances acceleration and speed.
Conclusion
Troubleshooting a Jupiter scooter that won’t start can be a frustrating experience. However, by following the steps outlined in this blog post, you can quickly diagnose and fix the issue. Start by checking the battery connections and ensuring they are clean and tight.
If that doesn’t solve the problem, consider inspecting the starter motor and ignition system for any faults. It’s also worth checking the fuel system, particularly if you notice a strong odor of gasoline. Finally, don’t forget to consult the owner’s manual or reach out to a professional for assistance if needed.
Remember, proper maintenance and regular inspections can go a long way in preventing scooter starting issues. By staying proactive, you can enjoy a smooth and hassle-free ride on your Jupiter scooter for years to come.