Ducati Scooter Not Charging: Troubleshooting Tips and Fixes
If your Ducati scooter is not charging, it could be due to a faulty battery or charging system. A professional inspection and testing of the battery, alternator, and voltage regulator may be required to determine the exact cause and provide a solution.
Additionally, checking the wiring connections and fuses should be part of the troubleshooting process. Preventive maintenance such as regular battery charging, proper storage, and ensuring a clean and secure electrical connection can help avoid charging issues in the future. Remember to consult an authorized Ducati service center or a qualified technician for accurate diagnosis and repair of charging problems.
Common Causes And Solutions
Discover the common causes and effective solutions for a Ducati scooter not charging. Get expert insights into troubleshooting tips and steps to ensure a hassle-free riding experience.
A dead battery can be one of the most common causes of a Ducati scooter not charging. However, several other factors can contribute to this issue as well. It’s essential to understand these common causes and their corresponding solutions to ensure your scooter’s charging system operates smoothly.
Battery Issues
- Loose or corroded battery connections: Check the battery terminals and cables for any looseness or corrosion. If you spot any, clean the connections and ensure they are tightly secured to the battery.
- Old or faulty battery: If your battery is several years old, it might be reaching the end of its lifespan. Consider replacing it with a new one and ensure it has the correct voltage and amp rating for your scooter.
- Lack of proper maintenance: Regularly check the battery’s water levels (if applicable) and keep it charged when not in use. Maintaining proper battery health can prevent charging issues.
Charging System Malfunction
- Faulty alternator: The alternator is responsible for generating electricity to charge the battery. If it’s not functioning correctly, your battery may not receive adequate power. Inspect the alternator for any signs of damage or wear, and replace it if necessary.
- Blown fuse: A blown fuse can disrupt the charging system and prevent the battery from charging. Check the scooter’s fuse box for any blown fuses related to the charging system and replace them as needed.
- Wiring issues: Examine the wiring connections between the battery, alternator, and voltage regulator. Look for any loose, damaged, or disconnected wires. Repair or replace any faulty wiring to ensure proper charging.
Faulty Voltage Regulator
- Overcharging or undercharging: A faulty voltage regulator can cause the battery to be overcharged or undercharged, leading to charging problems. Test the voltage regulator’s output to ensure it is within the acceptable range. If not, replace the voltage regulator.
- Poor ground connection: The voltage regulator requires a proper ground connection to function correctly. Check the ground wire connection and make sure it is securely attached to a clean, metal surface. Clean any corrosion or dirt that may affect the grounding.
Keep in mind that preventing these issues is just as crucial as addressing them. Regular maintenance, such as inspecting the battery and charging system, can help identify potential problems before they worsen. Additionally, consulting a professional mechanic or referring to your scooter’s manual can provide further guidance specific to your model.
Checking The Battery
If your Ducati scooter is not charging, checking the battery is essential. Ensure it is properly connected, free from corrosion, and fully charged for optimal performance. Regular battery maintenance can help you avoid issues and keep your scooter running smoothly.
:
If your Ducati scooter is not charging, the first thing you should do is check the battery. A weak or faulty battery can often be the reason behind this issue. Here are the steps to follow when checking the battery:
Testing The Battery Voltage:
- Use a voltmeter to measure the battery voltage.
- Attach the positive (red) lead of the voltmeter to the positive terminal of the battery.
- Attach the negative (black) lead of the voltmeter to the negative terminal of the battery.
- Check the voltage reading on the voltmeter.
- A fully charged battery should read around 12.6 to 12.8 volts.
- If the voltage reading is significantly lower, it indicates a weak or discharged battery that needs to be recharged or replaced.
Inspecting Battery Connections:
- Ensure the battery connections are tight and secure.
- Check the battery terminals for any signs of corrosion or damage.
- Make sure the positive and negative terminals are not loose or disconnected.
- Tighten any loose connections and ensure a proper electrical contact between the terminals and the battery.
Cleaning Battery Terminals:
- Prepare a mixture of baking soda and water.
- Dip an old toothbrush or a battery terminal cleaning brush into the mixture.
- Scrub the battery terminals and connectors gently to remove any corrosion or debris.
- Rinse the terminals with clean water and dry them thoroughly.
- Apply a thin layer of dielectric grease to the terminals to prevent future corrosion.
Remember, a healthy battery and properly connected terminals are crucial for the charging system to function effectively. By following these steps, you can eliminate battery-related issues and move on to diagnose other possible causes of the charging problem.
Testing The Charging System
To troubleshoot a Ducati scooter not charging, you can perform a series of tests on the charging system. Ensure the battery connections are secure, check the voltage output from the stator, and inspect the condition of the rectifier. These steps will help identify and resolve any charging issues.
If your Ducati scooter is not charging, it’s crucial to test the charging system to identify the issue. Here’s a step-by-step guide on how to verify the power output from the stator, check the rectifier/regulator, and test the alternator.
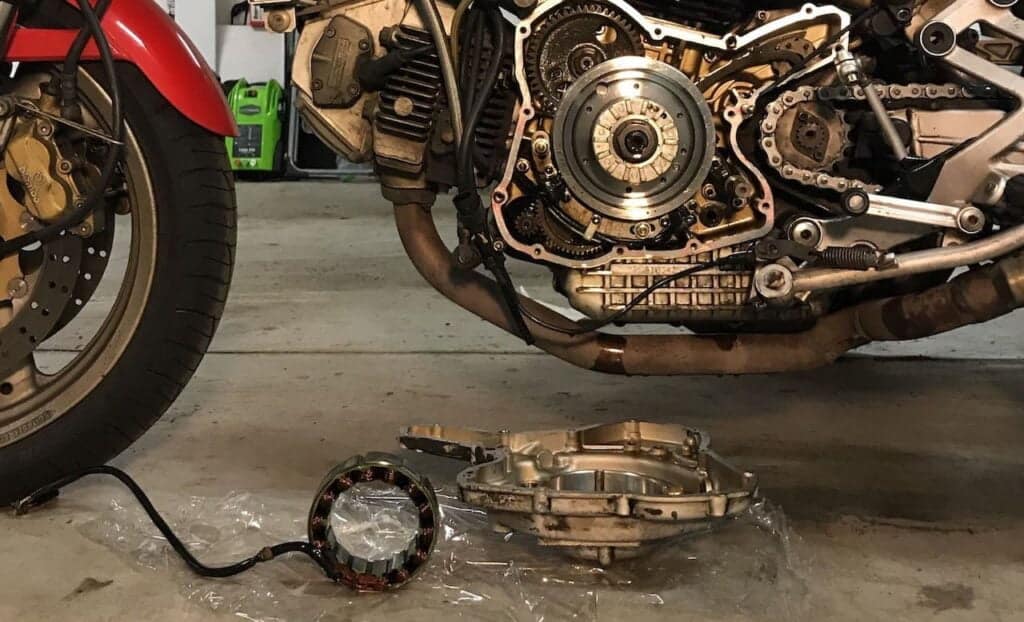
Verifying Power Output From The Stator:
- Begin by disconnecting the battery to prevent any accidental electrical shocks.
- Locate the stator, which is usually situated near the engine.
- Use a multimeter to measure the stator’s power output.
- Place the multimeter in AC voltage mode.
- Connect the multimeter leads to the stator’s connector pins.
- Start the scooter and rev the engine to around 5000 RPM.
- Check the multimeter reading, which should ideally show around 30-50 volts AC.
Checking The Rectifier/Regulator:
- Locate the rectifier/regulator, which can be found near the battery or under the seat.
- With the battery still disconnected, inspect the rectifier/regulator for any visible damage or signs of overheating.
- Using a multimeter, switch it to diode mode.
- Connect the multimeter leads to the rectifier/regulator pins.
- Measure the voltage drop across each diode by placing the multimeter’s positive lead on the anode side and the negative lead on the cathode side of the diode.
- Ensure the readings show a low voltage drop (around 0.3-0.7 volts) and are consistent across all diodes.
Testing The Alternator:
- Reconnect the battery and start the scooter.
- Use a multimeter to measure the battery voltage.
- Put the multimeter in DC voltage mode.
- Connect the multimeter leads to the battery terminals.
- Take note of the battery voltage.
- Gradually increase the engine RPM, ideally to around 3000 RPM, while monitoring the multimeter.
- The voltage reading should increase and stabilize around 13.5-14.5 volts.
- If the voltage continues to rise beyond this range, there may be a problem with the voltage regulator.
By following these steps, you can effectively test the charging system of your Ducati scooter. Remember to take necessary precautions and consult a professional if needed. This process will help you identify any faulty components and enable you to address the issue accordingly.
Fixing A Faulty Voltage Regulator
If your Ducati scooter is not charging, it may be due to a faulty voltage regulator. Fixing this issue will ensure the proper charging of your scooter’s battery. Trust a professional to diagnose and replace the faulty voltage regulator for optimal scooter performance.
Symptoms Of A Faulty Voltage Regulator
A faulty voltage regulator in your Ducati scooter can cause various issues with the charging system. Here are some common symptoms that may indicate a problem with the voltage regulator:
- Headlights flickering or dimming: If you notice your headlights flickering or becoming dimmer than usual, it could be a sign of a faulty voltage regulator.
- Battery not charging: One of the most common symptoms is a battery that fails to charge properly or quickly drains. This could be due to the voltage regulator not regulating the voltage correctly.
- Overcharging of the battery: On the other hand, a faulty voltage regulator may cause the battery to be overcharged, leading to electrolyte loss, damaged battery cells, and eventual failure.
- Electrical system malfunction: You might experience issues with other electrical components such as the turn signals, horn, or instrument panel. A faulty voltage regulator can cause fluctuations in the electrical system, affecting these components.
Replacing The Voltage Regulator
To fix a faulty voltage regulator in your Ducati scooter, you will need to replace it with a new one. Here’s a step-by-step guide to help you through the process:
- Disconnect the battery: Before you start working on the voltage regulator, disconnect the battery to prevent any electrical mishaps.
- Locate the voltage regulator: The voltage regulator in your Ducati scooter is usually located near the battery or close to the engine. Refer to your scooter’s manual or seek professional assistance if you’re not sure where to find it.
- Remove the old voltage regulator: Carefully disconnect the wires connected to the old voltage regulator. Take note of how the wires are connected or take pictures to ensure proper installation later. Unbolt the old regulator from its mounting bracket.
- Install the new voltage regulator: Position the new voltage regulator in place and secure it to the mounting bracket. Connect the wires following the same configuration as the old regulator.
- Reconnect the battery: Once the new voltage regulator is securely installed and wired correctly, reconnect the battery.
Proper Installation And Testing
After replacing the voltage regulator, it’s important to ensure proper installation and test its functionality. Here are some steps to follow:
- Double-check connections: Before starting your scooter, carefully inspect all connections to ensure they are secure and properly attached.
- Start the engine: Start your Ducati scooter and observe if the battery is charging properly. Check for any signs of dimming headlights or erratic electrical behavior.
- Test with a voltmeter: Use a voltmeter to measure the voltage output of the new regulator. Connect the positive and negative leads of the voltmeter to the corresponding battery terminals. Compare the reading with the recommended voltage for your scooter model.
- Take it for a ride: Lastly, take your scooter for a ride to verify that the new voltage regulator is working correctly under normal operating conditions. Pay attention to the performance of the electrical system and ensure the battery is maintaining a proper charge.
If you continue experiencing charging issues even after replacing the voltage regulator, it’s advisable to consult a professional mechanic with expertise in Ducati scooters. They can diagnose the problem accurately and provide appropriate solutions to get your scooter back on the road with a reliable charging system.
Professional Help And Maintenance Tips
Get professional help and maintenance tips for your Ducati scooter if it’s not charging. Learn expert tips to troubleshoot and fix the issue.
When To Seek Professional Assistance:
- If you have attempted the basic troubleshooting steps and your Ducati scooter is still not charging, it may be time to seek professional help.
- Professional technicians have the expertise and diagnostic tools to identify and resolve complex charging issues.
- Don’t hesitate to contact a certified Ducati service center or a qualified mechanic who specializes in scooter repairs.
- Entrusting your scooter to professionals ensures that the problem is properly diagnosed and fixed, saving you time and potential frustration.
Regular Maintenance To Prevent Charging Problems:
- Regular maintenance is key to preventing charging problems with your Ducati scooter.
- Follow these maintenance tips to keep your scooter’s charging system in optimal condition:
- Keep the battery terminals clean and free from corrosion by regularly inspecting and cleaning them. Corrosion can hinder the flow of electricity.
- Check the battery’s water levels (if applicable) and top up if necessary. Low water levels can lead to insufficient charging.
- Inspect the battery cables for any signs of wear or damage. Replace any damaged cables to maintain a secure connection.
- Ensure that the alternator belt is properly tensioned. A loose belt can result in inadequate charging.
- Regularly check the charging system components such as the rectifier/regulator and stator for any signs of malfunction. Replace faulty components as needed.
Tips For Extending Battery Life:
- By following these tips, you can prolong the life of your Ducati scooter’s battery and minimize charging problems:
- Avoid leaving the scooter unused for extended periods. Regularly starting the scooter and riding it helps keep the battery charged.
- Opt for shorter rides rather than infrequent long rides. Frequent charging cycles are beneficial for the battery’s health.
- If you plan to leave the scooter unused for an extended duration, consider using a battery tender or disconnecting the battery to prevent draining.
- Invest in a good quality battery that is compatible with your Ducati scooter. Quality batteries tend to have better longevity and performance.
- Avoid excessive use of electrical accessories when the scooter is idling. Minimize the strain on the charging system by using accessories judiciously.
Remember, preventive maintenance and timely professional assistance are crucial for troubleshooting and resolving charging problems with your Ducati scooter. Regular care for your scooter’s charging system will ensure a trouble-free riding experience.
Credit: motofomo.com
Frequently Asked Questions For Ducati Scooter Not Charging
How Do I Fix My Electric Scooter Not Charging?
To fix your electric scooter not charging: 1. Check if the charger is properly connected to both the scooter and the power source. 2. Examine the charger for any visible damage, such as frayed wires or loose connections. 3. Inspect the battery and ensure it is securely attached to the scooter and in good condition.
4. If none of the above solutions work, consult a professional technician to diagnose and fix the issue.
How Do You Reset An Electric Scooter Battery?
To reset an electric scooter battery, follow these steps: Disconnect the battery, wait for a few minutes, and reconnect it.
How Do You Fix A Lithium Ion Battery That Won’T Charge?
To fix a lithium ion battery that won’t charge, try these steps: 1. Reset the battery by removing it from the device and holding the power button for 10 seconds. 2. Check the charging cable and port for any damage or debris, and clean if needed.
3. Try a different charging cable and adapter to rule out any issues. 4. If the battery still won’t charge, it may need to be replaced. Contact the manufacturer for further assistance.
How Do I Know If My Scooter Battery Is Bad?
To determine if your scooter battery is bad, check if it loses charge quickly or if it doesn’t hold a charge.
Conclusion
To sum it up, if you own a Ducati scooter and are experiencing charging issues, it is crucial to diagnose and address the problem promptly. Start by checking the battery connections and inspecting for any signs of damage. Clean any corrosion or debris that may be obstructing the charging process.
If the battery is still not charging, it could indicate a faulty regulator/rectifier or stator, which may require professional assistance. Regular maintenance and proper charging habits are essential in preventing charging-related problems. Remember to charge your scooter’s battery regularly and avoid deep discharging.
By being proactive and attentive to your Ducati scooter’s charging system, you can ensure a smooth and trouble-free riding experience. Keep your scooter in top shape, and enjoy all the thrills that come with riding a Ducati.