Aovo Scooter Not Turning on: Troubleshoot and Fix the Issue Now!
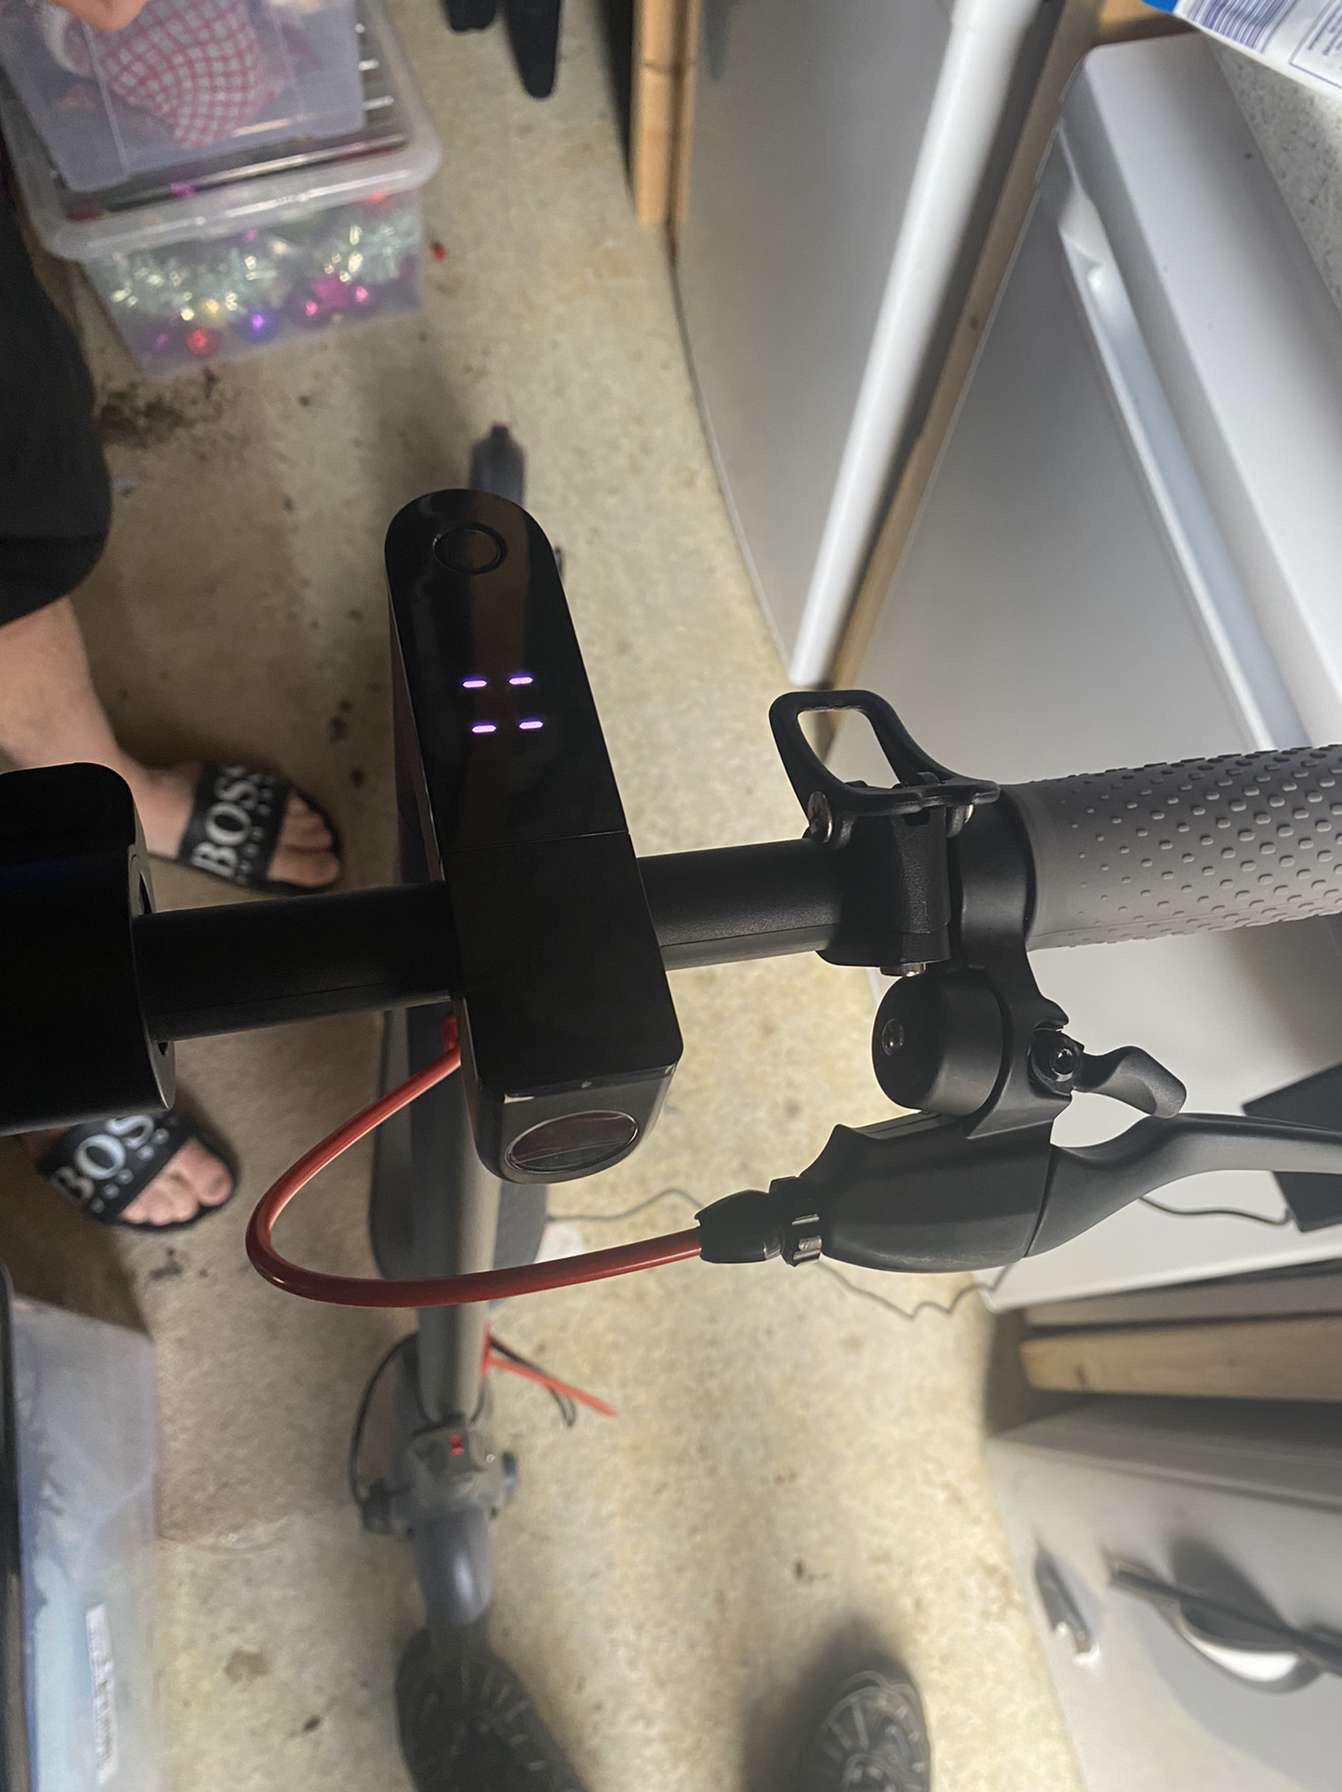
Aovo scooter not turning on could be due to a dead battery or a faulty power switch. Here are some possible solutions to get your Aovo scooter up and running again.
Firstly, ensure the scooter is charged by connecting it to a power source and let it charge for a few hours. If the battery is not the issue, check the power switch for any loose connections or damage. Tighten any loose connections or consider replacing the power switch if necessary.
If these steps don’t resolve the issue, it may be best to reach out to Aovo customer support for further assistance. Remember to always follow proper safety precautions when troubleshooting or repairing your Aovo scooter.
Battery Issues
Having trouble with your Aovo scooter not turning on? This could be due to battery issues, which can be solved by checking the connections, charging the battery fully, or replacing it if necessary. Ensure a smooth ride by addressing battery problems promptly.
Aovo Scooter Not Turning on:
If you’re experiencing problems with your Aovo scooter not turning on, it could be due to battery issues. The battery plays a crucial role in powering your scooter, and any malfunction can prevent it from starting up. In this section, we’ll explore the two most common battery-related problems and how to troubleshoot them.
Battery Is Not Charged:
- Check the battery indicator: Ensure that the battery is not completely drained by checking the indicator on your scooter. If the indicator shows no or low charge, it’s likely that the battery needs to be charged.
- Plug in your charger: Connect your scooter to the charger and make sure it’s properly plugged into an electrical outlet. Leave it to charge for the recommended duration as mentioned in the user manual.
- Verify the charging process: Look for indicators that show the battery is receiving a charge, such as a blinking LED light. If you don’t see any signs of charging, try a different electrical outlet or possibly a different charger to rule out any issues with the power source or charger itself.
Battery Is Faulty And Needs Replacement:
- Inspect for physical damage: Examine the battery for any signs of physical damage, such as dents, leaks, or bulges. If you notice any of these, it’s likely that the battery is faulty and needs to be replaced.
- Test the voltage: Use a voltmeter to check the voltage of the battery. If the reading is significantly lower than the recommended voltage range, it could indicate a faulty battery.
- Contact customer support: If you’ve tried troubleshooting the battery issues without success, reach out to Aovo customer support. They will be able to guide you through further steps or advise you on possible battery replacement options.
Remember, a malfunctioning battery can be the cause of your Aovo scooter not turning on. By following the troubleshooting steps outlined above, you can identify the issue and take the necessary steps to resolve it. Safe riding!
Electrical Problems
Having trouble turning on your Aovo scooter? It could be due to electrical problems. Let us help you diagnose and fix the issue efficiently and safely.
Loose Or Disconnected Wires
One of the most common electrical problems that can cause your Aovo scooter to not turn on is having loose or disconnected wires. This issue can occur due to various reasons such as vibrations, impacts, or improper assembly. If you’re experiencing this problem, you can check for loose or disconnected wires by following these steps:
- Inspect the wiring connections on your Aovo scooter, paying close attention to the main power cable, throttle cable, brake cables, and any other visible wires.
- Gently tug on each wire to ensure it is securely connected. If any wire feels loose or comes off easily, reconnect it properly.
- If you notice any damaged or frayed wires, they may need to be replaced.
- Ensure that all wires are properly routed and not pinched or trapped in any moving parts.
By addressing loose or disconnected wires, you can often resolve the issue and get your Aovo scooter turning on again.
Faulty Controller Or Motor
Another possible reason why your Aovo scooter is not turning on is due to a faulty controller or motor. The controller is responsible for regulating and controlling the scooter’s electrical system, while the motor is responsible for powering the scooter’s movement.
If either of these components malfunctions, it can prevent your scooter from turning on. Here are some signs that indicate a faulty controller or motor:
- The scooter does not respond or make any noise when attempting to turn it on.
- The scooter turns on but does not accelerate or move properly.
- You notice unusual sounds or burning smells coming from the motor or controller.
If you suspect a faulty controller or motor, it is recommended to seek professional assistance or contact the manufacturer for repair or replacement options. In some cases, it may be more cost-effective to replace the controller or motor altogether.
Burnt Out Fuse
A burnt out fuse can also be the culprit behind your Aovo scooter not turning on. The fuse acts as a protective device that interrupts the electrical circuit when there is a power surge or short circuit to prevent damage to the scooter’s components.
If a fuse blows or burns out, it will disrupt the electrical flow and cause the scooter to lose power. To check if you have a burnt out fuse:
- Locate the fuse box, typically located near the battery compartment or under the scooter’s deck.
- Open the fuse box cover and visually inspect the fuses for any signs of burn marks or damage.
- If you find a blown fuse, replace it with a fuse of the same rating.
It’s important to note that repeatedly blowing fuses may indicate an underlying electrical issue that requires professional diagnosis and repair. If you replace a fuse and it blows again, it’s best to consult a technician who specializes in scooter repairs.
By being aware of these common electrical problems, such as loose or disconnected wires, faulty controllers or motors, and burnt out fuses, you can troubleshoot your Aovo scooter not turning on and take the necessary steps to resolve the issue.
Remember, if you encounter complex electrical problems or are unsure of how to proceed, seeking professional assistance is always recommended.
Mechanical Malfunctions
The Aovo scooter may fail to turn on due to mechanical malfunctions such as a dead battery, faulty wiring, or a defective power switch. These issues can be resolved by troubleshooting the scooter’s components or seeking professional assistance.
One of the frustrating issues you may encounter with your Aovo scooter is when it simply refuses to turn on. This can be attributed to various mechanical malfunctions that hinder the smooth functioning of your scooter’s ignition switch and kickstand switch.
In this section, we will explore two common causes for your scooter not turning on: a stuck ignition switch and a faulty kickstand switch.
Stuck Ignition Switch:
- The ignition switch may become stuck due to debris or corrosion in the mechanism.
- In some cases, the internal components of the ignition switch may get worn out or damaged.
- One possible reason for a stuck ignition switch could be a loose or broken electrical connection.
- If you’ve recently dropped or impacted your scooter, it could cause misalignment in the ignition switch, resulting in difficulty turning it on.
Faulty Kickstand Switch:
- The kickstand switch is designed to prevent the scooter from starting while the kickstand is down as a safety measure.
- If the kickstand switch becomes faulty, it may incorrectly signal that the kickstand is still down, even when it is fully retracted.
- A damaged or frayed wire connected to the kickstand switch can cause it to malfunction.
- Any debris or dirt around the kickstand switch can interfere with its proper functioning.
These mechanical malfunctions can be frustrating, but there are troubleshooting steps you can try to resolve the issue before seeking professional assistance. Remember to exercise caution and follow safety guidelines when attempting any DIY fixes on your Aovo scooter.
Check Battery Connection
To troubleshoot why your Aovo scooter is not turning on, start by checking the battery connection. Ensure that the battery is securely connected to the scooter’s wiring to resolve any power issues.
Ensure Battery Is Securely Connected To The Scooter
Having trouble with your Aovo scooter not turning on? One of the first things to check is the battery connection. A loose or faulty connection can prevent your scooter from powering up. Follow these simple steps to ensure your battery is securely connected:
- Inspect the battery wires: Check the connection points where the battery wires connect to the scooter. Make sure they are tightly secured and not loose or frayed.
- Verify the battery position: Ensure that the battery is properly positioned in its designated compartment. Sometimes, slight movements or vibrations during scooter use can cause the battery to shift out of place.
- Clean battery terminals: Over time, battery terminals can accumulate corrosion or dirt, which can hinder the flow of power. Use a clean cloth or brush to gently remove any build-up from the battery terminals.
- Reconnect the battery: If you find any loose connections or dirt on the terminals, remove the battery temporarily and reconnect it securely, ensuring a snug fit.
- Check for battery damage: Inspect the battery for any signs of damage, such as cracks or leakage. If you notice any, it’s important to replace the battery promptly.
By following these steps, you can rule out battery connection issues as the cause of your Aovo scooter not turning on. If the problem persists, you may need to explore other troubleshooting options or seek assistance from a professional technician.
Remember to perform these checks regularly to ensure optimal performance and longevity of your scooter’s battery.
Charge The Battery
To resolve the issue of Aovo Scooter not turning on, charge the battery fully and ensure it is properly connected. This simple step can often fix the problem and get your scooter up and running again.
Is your Aovo scooter not turning on? One common issue could be that the battery is drained and needs to be charged. Here’s what you can do:
Connect The Scooter To A Charger And Wait For The Battery To Fully Charge:
- Attach the charger to the charging port on your Aovo scooter.
- Make sure the charger is securely plugged into a power outlet.
- Keep an eye on the charger indicator to ensure it is functioning properly.
- Wait patiently while the battery charges, as it may take a few hours to reach full capacity.
Remember, a fully charged battery is essential for the proper functioning of your Aovo scooter. So, be patient and allow the battery to charge completely.
If your scooter still doesn’t turn on after charging the battery, there might be another issue that needs to be addressed. Consult the user manual or contact the manufacturer’s customer support for further assistance.
Keep in mind that regular maintenance and care can prolong the lifespan of your scooter’s battery. It’s recommended to recharge the battery after each use and avoid leaving it discharged for extended periods.
By following these simple steps, you can ensure that your Aovo scooter’s battery is charged and ready to go whenever you need it.
Test The Battery
To troubleshoot why your Aovo scooter is not turning on, start by testing the battery. Ensure it is properly charged and connected, as a low battery can prevent the scooter from powering up.
Aovo Scooter Not Turning On
If you’re experiencing issues with your Aovo scooter not turning on, it can be frustrating and inconvenient. One possible reason for this problem could be a battery issue. In this section, we will discuss how to test the battery to determine if it is providing sufficient voltage.
Use A Multimeter To Check If The Battery Is Providing Sufficient Voltage:
- Make sure the scooter is turned off and disconnected from any power source.
- Set your multimeter to the DC voltage setting.
- Connect the multimeter’s red probe to the positive terminal of the battery and the black probe to the negative terminal.
- Read the voltage displayed on your multimeter. A fully charged battery should ideally read around 42 volts.
- If the reading is significantly lower than the expected voltage, it indicates that the battery might be drained or defective.
Remember, it’s also important to check the charging status and any loose connections before concluding that the battery is the problem. Troubleshooting each component thoroughly can help pinpoint the underlying issue and determine the necessary steps to resolve it.
Battery Testing Summary:
- Turn off the scooter and disconnect it from any power source.
- Set the multimeter to the DC voltage setting.
- Connect the red probe to the positive terminal and the black probe to the negative terminal.
- Check the displayed voltage, aiming for approximately 42 volts for a fully charged battery.
- Compare the measured voltage with the expected value to determine battery health.
By performing a battery test using a multimeter, you can gather valuable information about the voltage supply and health of the battery. This process will help you determine if the battery is the root cause of your Aovo scooter not turning on and guide you in finding a suitable solution.
Inspect Wiring Connections
Inspecting the wiring connections can help troubleshoot why your Aovo scooter is not turning on. By carefully examining the connections, you may identify any loose or damaged wires that could be the cause of the issue. Making sure all wires are securely connected is an essential step in resolving this problem.
:
When your Aovo scooter refuses to turn on, it can be incredibly frustrating. One of the potential reasons for this issue could be loose or disconnected wiring connections. By inspecting these connections, you may be able to identify and resolve the problem.
Here are some steps you can follow to check the wiring connections:
- Remove the scooter’s cover or casing to gain access to the internal components.
- Visually examine all the wiring connections, looking for any loose or disconnected wires.
- Pay close attention to the connectors and ensure that they are securely fastened.
- Gently push and wiggle the connectors to ensure a snug fit.
- If you identify any loose wires, reconnect them securely to their respective connectors.
- Make sure that each wire is attached to the proper connection point based on its color-coding or labeling.
- Double-check the positioning of each wire, ensuring they are not tangled or causing any obstruction.
- Once all the wiring connections are inspected and any loose wires are securely reconnected, proceed to test if the scooter turns on.
Now that you have inspected the wiring connections and addressed any loose or disconnected wires, it’s time to test whether your Aovo scooter turns on. If the issue persists, there might be other underlying problems that require further investigation or professional assistance.
Stay tuned for our next section on troubleshooting additional potential causes for your Aovo scooter not turning on.
Check Controller And Motor
To troubleshoot an Aovo scooter not turning on, start by checking the controller and motor. Make sure all connections are secure and free from any damage that may cause power issues.
Sometimes, you may encounter issues with your Aovo scooter not turning on. Before you panic, there are a few things you can check to troubleshoot the problem. In this section, we’ll focus on inspecting the controller and motor for any signs of damage or malfunctions.
Inspect The Controller And Motor For Any Signs Of Damage Or Malfunctions:
- Check the wiring connections: Ensure that all the wires are securely connected and not loose or damaged. Loose connections can disrupt the flow of electricity and prevent your scooter from turning on.
- Look for physical damage: Examine the controller and motor for any visible signs of damage, such as cracks, dents, or exposed wires. Physical damage can affect the functionality of these components, leading to power issues.
- Check for water damage: Moisture or water ingress can impact the performance of the controller and motor. Look for any signs of water damage, such as rust or corrosion. If you suspect water damage, it’s crucial to address the issue promptly to prevent further complications.
- Test the voltage: Use a multimeter to check the voltage of the battery and ensure it is within the appropriate range. A low voltage can indicate a problem with the controller or motor.
- Listen for abnormal sounds: Turn on the scooter and listen for any unusual noises coming from the motor or controller. Strange sounds can be an indication of internal malfunctions that require attention.
- Consider replacing the faulty component if necessary: If you have identified a damaged or malfunctioning controller or motor, it may be necessary to replace it. Contact the manufacturer or a professional technician for guidance on obtaining the right replacement part and ensure a proper installation.
Remember, it’s essential to handle any repairs or replacements with caution. If you are unsure of how to proceed or lack the necessary expertise, it’s best to seek assistance from a qualified professional to avoid further complications.
By inspecting the controller and motor for any signs of damage or malfunctions, you can pinpoint the issue and take the appropriate steps to restore your Aovo scooter’s functionality.
Replace Burnt-Out Fuse
To get your Aovo scooter up and running again, check if the fuse is burnt out and replace it if necessary. This simple fix can solve the issue of the scooter not turning on.
If your Aovo scooter is not turning on, one possible cause could be a burnt-out fuse. The fuse is a safety device that protects the electrical system of the scooter from damage. When a fuse blows, it breaks the circuit and prevents electrical current from flowing through it.
To resolve this issue, you can follow these steps:
Locate The Fuse Box And Check If Any Fuses Are Burnt Out:
- Find the fuse box in your Aovo scooter. It is usually located near the battery or under the seat.
- Open the fuse box cover to access the fuses.
- Inspect each fuse carefully to check if it is burnt out. Look for a darkened or broken filament inside the fuse.
Replace The Fuse With A New One Of The Same Rating:
- Purchase a replacement fuse that has the same rating as the original one. This information is usually marked on the fuse itself or in the scooter’s manual.
- Carefully remove the burnt-out fuse from its socket. You may need to use a fuse puller or pliers for this.
- Insert the new fuse into the empty socket, making sure it fits securely.
- Close the fuse box cover.
Remember, safety is crucial, so always ensure the scooter is turned off before working on it. By replacing a burnt-out fuse with a new one, you can resolve the issue of your Aovo scooter not turning on. If the problem persists, it may be advisable to seek professional assistance or consult the manufacturer’s customer support.
Fix Stuck Ignition Switch
If your Aovo scooter is not turning on, the most common issue could be a stuck ignition switch. To fix this problem, you might need to carefully inspect the switch, clean any debris, and ensure it is properly aligned and functioning.
If the issue persists, it is advisable to seek professional assistance or consult the manufacturer’s guidelines for further troubleshooting steps.
Is your Aovo scooter not turning on? One common issue that can cause this problem is a stuck ignition switch. If you’re experiencing difficulty turning your scooter on, follow these steps to fix a stuck ignition switch.
Clean The Ignition Switch And Remove Any Debris That May Be Causing It To Stick:
- Inspect the ignition switch for any visible debris or dirt buildup.
- Use a soft cloth or brush to gently clean the surface of the switch.
- Pay close attention to the area around the keyhole.
- If there is any stubborn grime, you can use a mild soap solution and water to clean it.
- Dry the switch thoroughly to ensure proper functioning.
Use Lubricant To Ensure Smooth Movement Of The Switch:
- Apply a small amount of lubricant, such as WD-40, to the key and insert it into the switch.
- Turn the key back and forth a few times to distribute the lubricant inside the switch.
- Wipe off any excess lubricant with a clean cloth.
- Test the ignition switch by turning it on and off to check if it moves smoothly.
Remember to exercise caution when applying lubricant, as excessive use can attract more dirt and cause future problems. If you’ve followed these steps and the ignition switch is still not turning on, it may be an indication of a more serious issue, and it’s recommended to consult a professional technician or reach out to the manufacturer for further assistance.
By following these simple steps, you can fix a stuck ignition switch on your Aovo scooter and get back on the road in no time.
Troubleshoot Kickstand Switch
Having trouble turning on your Aovo scooter? It could be due to a malfunctioning kickstand switch. Troubleshoot the issue by checking the switch for any damage or loose connections.
Check If The Kickstand Switch Is Functioning Properly
If your Aovo Scooter is not turning on, one of the possible culprits could be a faulty kickstand switch. The kickstand switch is designed to prevent the scooter from starting while the kickstand is down. However, if the switch is not functioning correctly, it may prevent the scooter from turning on even when the kickstand is up.
Here are a few steps to troubleshoot the kickstand switch:
- Inspect the kickstand switch:
- Ensure that the kickstand is fully raised and properly aligned with the switch.
- Look for any visible signs of damage or corrosion on the switch.
- Test the kickstand switch:
- Start by turning off the scooter and setting the kickstand down.
- Try starting the scooter. If it doesn’t turn on, it means the switch is working correctly.
- Raise the kickstand and attempt to start the scooter again. If it still doesn’t turn on, the kickstand switch might be faulty.
- Adjust or replace the switch:
- If the kickstand switch seems misaligned, you can try adjusting its position to ensure proper contact.
- In case there are signs of damage or corrosion, replacing the switch might be necessary.
- Consult the user manual or contact the manufacturer for guidance on how to adjust or replace the kickstand switch.
Remember to follow proper safety precautions and consult professional assistance if needed. Troubleshooting the kickstand switch can help resolve the issue of your Aovo Scooter not turning on.

Credit: theelectricfuture.eu
Regular Maintenance
Regular maintenance is crucial to keep your Aovo scooter in top shape. If your scooter isn’t turning on, it may be time to check the battery, wiring, and connections to ensure everything is functioning properly. Regular inspections and maintenance can help prevent such issues and keep your scooter running smoothly.
Regular maintenance is crucial for keeping your Aovo scooter in optimal condition. By following the scooter’s maintenance schedule and conducting regular inspections and tune-ups, you can ensure that all components are in good working order. This will not only extend the lifespan of your scooter but also contribute to a safe and enjoyable riding experience.
Here are some key points to consider:
Inspect The Battery
- Check the battery connections and cables for any signs of damage or corrosion.
- Ensure the battery is securely fastened in its compartment.
- Test the battery voltage periodically to determine its health.
Assess The Brakes
- Inspect the brake pads for excessive wear and tear.
- Check the brake cables for any signs of fraying or damage.
- Test the brakes to ensure they are responsive and effective.
Check The Wheels And Tires
- Examine the wheels for any visible damage or cracks.
- Check the tire pressure regularly and inflate as needed.
- Inspect the tires for wear and replace them if the tread depth is insufficient.
Lubricate Moving Parts
- Apply lubricant to the scooter’s moving parts, such as the folding mechanism, kickstand, and brake levers.
- Ensure smooth operation by regularly lubricating the scooter’s steering column and handlebar.
Inspect The Frame
- Examine the scooter’s frame for any cracks or signs of damage.
- Check the frame’s connections and fasteners to ensure they are tight and secure.
- Clean the frame regularly to prevent corrosion and maintain its appearance.
Test The Lights And Electronics
- Inspect all lights, including the headlights, taillights, and turn signals, for proper function.
- Check the wiring and connectors for any loose connections or damage.
- Test the scooter’s electronics, such as the display panel and throttle, to ensure they are working correctly.
Regular maintenance is vital to the longevity and performance of your Aovo scooter. By adhering to the maintenance schedule and conducting routine inspections, you can identify and address any issues promptly. Stay on top of regular tune-ups to keep all components in good working condition, ensuring a safe and enjoyable riding experience.
Proper Charging Habits
To troubleshoot the issue of your Aovo scooter not turning on, it is important to consider your charging habits. Make sure to charge the scooter properly and consistently, avoiding overcharging or undercharging, to ensure optimal performance and functionality.
If you’re having difficulties getting your Aovo scooter to turn on, it could be due to improper charging habits. Charging the battery correctly is crucial for ensuring optimal performance and longevity. By following the manufacturer’s instructions and avoiding overcharging or undercharging, you can easily resolve this issue.
Let’s take a closer look at proper charging habits:
Charge The Battery According To The Manufacturer’S Instructions
- Connect the charger to a reliable power source before plugging it into your scooter.
- Make sure to use the specific charger that came with your Aovo scooter.
- Follow the recommended charging time specified by the manufacturer.
- Keep an eye on the charging progress to ensure it doesn’t exceed the recommended duration.
Avoid Overcharging Or Undercharging The Battery
- Do not leave the scooter plugged in for an extended period after it reaches full charge.
- Overcharging can lead to battery damage and reduced overall lifespan.
- Similarly, do not let the battery deplete completely before recharging.
- Undercharging the battery regularly can cause it to lose capacity and effectiveness.
By adhering to these proper charging habits, you can significantly improve the performance and functionality of your Aovo scooter. Remember, always follow the manufacturer’s instructions and avoid overcharging or undercharging the battery. Enjoy a hassle-free riding experience with your fully powered Aovo scooter!
Safe Storage
If your Aovo scooter is not turning on, it’s crucial to explore safe storage options. Ensure that the scooter is stored in a dry and secure location, away from extreme temperatures and moisture, to avoid any potential issues with power failure.
When it comes to ensuring the longevity of your Aovo scooter, proper storage is essential. By taking a few precautions, you can protect your scooter from unnecessary damage caused by moisture or extreme temperatures. Here are some tips to help you store your scooter safely:
- Store the scooter in a dry and protected area: Moisture is one of the biggest enemies of electronic devices, and your Aovo scooter is no exception. Find a place in your home or garage that is sheltered from rain or snow. This will prevent water damage and help maintain the scooter’s functionality for years to come.
- Protect it from extreme temperatures: Like most electronic devices, your Aovo scooter is susceptible to damage from extreme temperatures. Avoid storing it in areas that experience excessive heat or cold, such as attics or basements. Instead, opt for a temperature-controlled environment to maintain the optimal performance of your scooter.
- Consider using a scooter cover: Dust and debris can accumulate on your Aovo scooter, affecting both its appearance and performance. To keep it clean and protected, invest in a scooter cover. This simple accessory will shield your scooter from harmful elements, ensuring it stays in top-notch condition.
Proper storage is crucial for keeping your Aovo scooter in optimal condition. By storing it in a dry and protected area, protecting it from extreme temperatures, and using a scooter cover, you can extend the longevity of your scooter and enjoy smooth rides for years to come.
Frequently Asked Questions Of Aovo Scooter Not Turning On
Why Is My Aovo Pro Electric Scooter Not Turning On?
Your AOVO Pro electric scooter may not be turning on due to potential issues with the battery or power connection.
Why Is My Electric Scooter Not Turning On?
Your electric scooter may not be turning on due to a battery issue, a loose connection, or a faulty switch.
How Do You Turn On An Aovo Electric Scooter?
To turn on an AOVO electric scooter, press and hold the power button for a few seconds.
Where Is The Reset Button On My Electric Scooter?
The reset button on your electric scooter can usually be found near the battery or control panel.
Conclusion
To troubleshoot your Aovo scooter not turning on, it’s essential to follow a systematic approach. Start by checking the battery and ensuring it is adequately charged. If that’s not the issue, inspect the power switch and connections to ensure they are secure.
Additionally, verify that the scooter is not in a locked or folded position. If these solutions don’t resolve the issue, it may be necessary to consult the scooter’s manual or reach out to customer support for further assistance. Remember to conduct regular maintenance to avoid similar issues in the future, such as inspecting the electrical components and keeping the scooter clean and dry.
By taking these steps, you can likely overcome the problem and get back on the road with your Aovo scooter without any issues or interruptions. Happy riding!

